It's finally Friday. Here are six yummy recipes to help you through the weekend, including Teriyaki Tofu Kabobs and Black Bean Breakfast Burrito with Plantains and Mango Salsa. Enjoy!
BAKED BANANA SPLITS
This was in an old Weight Watchers email (we're talking more than 10 years ago). The plan has changed several times since then.
This recipe begins, “Try substituting any flavored extract you like in the sauce for this creative take on banana splits. Almond, maple, rum, orange -- let your imagination run wild. They're perfect for Mother's Day!”
POINTS® Value: 4 (value from when this recipe was emailed); Servings: 4; Preparation Time: 15 min; Cooking Time: 30 min; Level of Difficulty: Easy
Ingredients
1 sprays cooking spray
4 large banana(s), ripe, peeled
8 oz canned crushed pineapple in juice, drained
2 Tbsp McNeil Nutritionals SPLENDA No Calorie Sweetener, divided
1/2 tsp ground cinnamon
1 cup fat-free ricotta cheese
1 tsp vanilla extract
1 cups raspberries
Directions
Preheat oven to 400°F. Coat a 9-inch baking pan with cooking spray. Place bananas in pan.
Combine pineapple, 1 tablespoon of Splenda and cinnamon in a small bowl; pour over bananas. Cover pan with foil and bake for 30 minutes. (Note: The canned pineapple is already sweet so omit the Splenda if you prefer.)
Meanwhile, combine ricotta, remaining tablespoon of Splenda and vanilla in another small bowl; set aside.
Place one baked banana in each of four individual serving bowls and top each with about 2 tablespoons of pineapple sauce and 1/4 cup of ricotta mixture. Top each with 1/4 cup of raspberries. Serve immediately.
Note: Okay, this is me talking. I personally would refrain from the Splenda, simply because I'm not a big fan of non-sugar/honey/maple syrup (read not-quite-sure-it's-not-synthetic) sweeteners. But that's my preference. I would use sugar or no sweetener at all. It's your call here.
WATERMELON SORBET
This came from the infamous long-since-forgotten emailing list. Makes 8 servings.
The recipe began, “This fresh sorbet is the perfect dessert for a tropical meal.”
Ingredients
1/2 cup plus 4 cups seeded and pureed watermelon
1/2 cup sugar
2 tablespoons lime juice
1 teaspoon lime zest
Directions
In a small saucepan, bring 1/2 cup watermelon puree and sugar to simmer and remove it from heat. Add lime juice and zest and allow mixture to cool for 20 minutes. Add the 4 cups fresh watermelon puree to melon-lime mixture, then freeze in an ice cream maker according to manufacturer’s instructions.
TERIYAKI TOFU KABOBS
Recipe Yield: Yield 4 servingsServing Size: 2 skewers
Source: The Diabetes Food and Nutrition Bible
Book Title: The Diabetes Food and Nutrition Bible
View this online at https://diabeticgourmet.com/diabetic-recipes/teriyaki-tofu-kabobs.
Ingredients
8 bamboo skewers
3/4 pound extra firm tofu, drained and cut into 32 cubes
1 red pepper, cut into 16 squares
1 cup canned pineapple chunks, reserve 1/2 cup juice
1 tablespoon lite soy sauce
1 clove garlic
2 teaspoons minced ginger
Directions
Soak skewers in water for 30 minutes to keep them from burning as you cook the skewers.
Meanwhile, put the tofu, red pepper, and pineapple chunks in a plastic bag or container with a lid. Add reserved pineapple juice, soy sauce, garlic, and ginger. Marinate for at least 30 minutes.
Drain, reserving marinade to baste. Thread the tofu, red pepper, and pineapple on the skewers.
Prepare an outdoor grill or oven broiler with the rack set 6 inches from the heat source. Grill or broil the kabobs about 5 minutes per side, basting with the marinade. Serve with brown rice.
Nutritional Information Per Serving: Calories: 107; Fat: 2 g; Sodium: 147 mg; Protein: 7 g; Carbohydrates: 17 g
Diabetic Exchanges: 1 Carbohydrate, 1 Very Lean Meat
RED LENTIL SOUP WITH LEMON
This is from Melissa Clark in The New York Times cooking e-newsletter. Melissa wrote, “This is a lentil soup that defies expectations of what lentil soup can be. It is light, spicy and a bold red color (no murky brown here): a revelatory dish that takes less than an hour to make. The cooking is painless. Sauté onion and garlic in oil, then stir in tomato paste, cumin and chile powder and cook a few minutes more to intensify flavor. Add broth, water, red lentils (which cook faster than their green or black counterparts) and diced carrot, and simmer for 30 minutes. Purée half the mixture and return it to the pot for a soup that strikes the balance between chunky and pleasingly smooth. A hit of lemon juice adds an up note that offsets the deep cumin and chile flavors.” Yield: 4 servings; Time: 45 minutes.
This was featured in “A Lentil Soup to Make You Stop, Taste and Savor and can be viewed online here.
Want to know more about making soup? Check out Samin Nosrat’s guide “How to Make Soup”.
Also, check out Melissa Clark’s guide, “Hot to Cook Beans.”
Note: The recipe originally called for either chicken or veggie broth. I've left it at simply veggie broth (for obvious reasons)
Ingredients
3 tablespoons olive oil, more for drizzling
1 large onion, chopped
2 garlic cloves, minced
1 tablespoon tomato paste
1 teaspoon ground cumin
1/4 teaspoon kosher salt, more to taste
1/4 teaspoon ground black pepper
Pinch of ground chile powder or cayenne, more to taste
1 quart vegetable broth
2 cups water
1 cup red lentils
1 large carrot, peeled and diced
Juice of 1/2 lemon, more to taste
3 tablespoons chopped fresh cilantro
Preparation
In a large pot, heat 3 tablespoons oil over high heat until hot and shimmering. Add onion and garlic, and sauté until golden, about 4 minutes.
Stir in tomato paste, cumin, salt, black pepper and chili powder or cayenne, and sauté for 2 minutes longer.
Add broth, 2 cups water, lentils and carrot. Bring to a simmer, then partially cover pot and turn heat to medium-low. Simmer until lentils are soft, about 30 minutes. Taste and add salt if necessary.
Using an immersion or regular blender or a food processor, purée half the soup then add it back to pot. Soup should be somewhat chunky.
Reheat soup if necessary, then stir in lemon juice and cilantro. Serve soup drizzled with good olive oil and dusted lightly with chili powder if desired.
BLACK BEAN BREAKFAST BURRITO WITH PLANTAINS AND MANGO SALSA
This comes from the March 2015 issue of Vegetarian Times, page 36. It begins, “Ripe plantains have a starchy consistency like potatoes, but with more fiber.” Serves 4 in 30 minutes or less.
To view this online, click here.
2 cups sliced ripe plantains (2 medium)
1 lime, juiced and zest grated (2 Tbs. juice and 1 tsp. zest)
1 15-oz. can black beans, drained and rinsed
1/2 cup prepared mango salsa, plus more for serving, optional
4 8-inch flour tortillas, warmed
Combine plantains, lime juice, and 1/2 cup water in small saucepan. Bring to a boil over medium heat, cover pan, and simmer 20 minutes, or until plantains are very soft. Mash with fork or potato masher, and stir in lime zest. Season with salt and pepper, if desired.
Combine beans and salsa in small saucepan; warm over medium heat 3 to 5 minutes, stirring occasionally. Season with salt and pepper, if desired.
Spread heaping 1/4 cup plantains on bottom half of each tortilla, leaving 2-inch border. Top with 1/2 cup bean mixture. Fold sides of tortilla over filling, then roll from bottom up. Serve with additional salsa, if using.
nutritional information Per Burrito: Calories: 349; Protein: 11 g; Total Fat: 4 g; Saturated Fat: 2 g; Carbohydrates: 72 g; Cholesterol: 0 mg; Sodium: 779 mg; Fiber: 9 g; Sugar: 18 g; Vegan
EXTRA-EASY SPINACH LASAGNA
This is from FamilyTime, and begins, “No need to cook the lasagna noodles...just layer them right in the pan with the cheeses, spinach and tomato-mushroom sauce.”
Serves: 8 servings (1 cup each); Prep Time: 20 minutes; Cook Time: 50 minutes
View this online here.
Ingredients
1 container (15 ounces) ricotta cheese
1 package (10 ounces) frozen chopped spinach, thawed and well drained
8 ounces shredded mozzarella cheese (about 2 cups)
1 jar (24 ounces) Prego® Fresh Mushroom Italian Sauce
6 uncooked lasagna noodle
1/4 cup water
Directions
Stir the ricotta cheese, spinach and 1 cup mozzarella cheese in a medium bowl.
Spread 1 cup sauce in a 2-quart shallow baking dish. Top with 3 lasagna noodles and half the spinach mixture. Repeat the layers. Top with the remaining sauce. Slowly pour water around the inside edges of the baking dish. Cover.
Bake at 400°F. for 40 minutes. Uncover the dish. Sprinkle with the remaining mozzarella cheese. Bake for 10 minutes or until it's hot and bubbling. Let stand for 10 minutes.
Tip: To thaw the spinach, microwave on HIGH for 3 minutes, breaking apart with a fork halfway through heating.
Friday, July 26, 2019

Thursday, July 25, 2019
Ice Cream
“Chubby Hubby ice cream – I can't say no anymore.” - Sidney Biddle Barrows, the erstwhile Mayflower Madam, on the subject of her sole remaining vice. -
Found in Loose Cannons: Devastating Dish from the World's Wildest Women, complied by Autumn Stephens, page 21.
I absolutely love ice cream. One of my favorite childhood memories was making homemade ice cream. (Of course, this was using a hand crank ice cream maker. Most ice cream makers now are electric, which is a lot easier on the arms.)
Today's yummy offerings include Key Lime Pie Pops and Homemade Rocky Road Ice Cream. Enjoy!
WATERMELON SORBET
This came from the infamous long-since-forgotten emailing list. Makes 8 servings.
The recipe began, “This fresh sorbet is the perfect dessert for a tropical meal.”
Ingredients
1/2 cup plus 4 cups seeded and pureed watermelon
1/2 cup sugar
2 tablespoons lime juice
1 teaspoon lime zest
Directions
In a small saucepan, bring 1/2 cup watermelon puree and sugar to simmer and remove it from heat. Add lime juice and zest and allow mixture to cool for 20 minutes. Add the 4 cups fresh watermelon puree to melon-lime mixture, then freeze in an ice cream maker according to manufacturer’s instructions.
BEST PINEAPPLE ORANGE SORBET
I don’t know about you, but I’ve been on several bulletin boards over the years (mainly feminist bulletin boards), and find others’ nicknames on the boards interesting. This was posted on a long-since-forgotten-emailing-list by hungry kitten and was from mydailymoment.com. Hungrykitten wrote, “I like this recipe because you don't need an ice cream maker. Cooking time is freezing time.” Time: 2 1/4 hours; 15 min prep; serves 10.
To view this online, click here.
1/2 cup water
1/2 cup granulated sugar
2 cups orange juice
1 tablespoon lemon juice
1 (20 ounce) can pineapple, crushed
2 teaspoons orange zest, freshly grated
In a medium saucepan, bring water and sugar to a simmer over medium high heat until sugar is dissolved.
In a blender, puree pineapple with its juice until smooth. Transfer to a metal bowl, and stir in lemon juice, orange juice, and orange zest. Freeze until slightly firm, but not frozen and process mixture again in the blender until smooth. Transfer to a freezer container and freeze until firm, about 2 hours.
RED, WHITE & BLUE POPSICLES
This is from Matt Abdoo and was posted on the TODAY Show’s site. Matt wrote, “Who doesn't love a popsicle? Especially when it's homemade with real fruit! They're easy to eat, a fun dessert and can be color customized to suit the summer celebration. Technique tip: Use silicone molds that will release the popsicles easy.
“Swap option: Swap out raspberries for strawberries or use frozen fruit.”
Prep Time: 15 minutes; Cook Time 3 hours; Yield: 6 popsicles
To view this online, go to https://www.today.com/recipes/red-white-blue-popsicles-recipe-t154820.
Ingredients
Red Layer
1 1/2 cups fresh strawberries
1 teaspoon cane sugar
White Layer
1 cup coconut milk
1 teaspoon vanilla extract
1 teaspoon cane sugar
Blue Layer
1 1/2 cups fresh blueberries
1 teaspoon cane sugar
Preparation
Place the empty popsicle molds in the freezer.
For the red layer:
Puree the strawberries with the sugar in a blender until smooth. Transfer to a container that is easy to pour out of and reserve.
For the white layer:
Whisk together the coconut milk, sugar and vanilla and transfer to a container that is easy to pour out of and reserve.
For the blue layer:
Puree the blueberries with the sugar in a blender until smooth. Transfer to a container that is easy to pour out of and reserve.
To assemble:
Remove the popsicle molds from the freezer and evenly pour the strawberry puree first into the molds. Place the molds in the freezer and allow freezing for one hour or until firm.
Once the strawberry layer has set up, remove the molds from the freezer and evenly pour in the coconut mixture and return the molds to the freezer and allow freezing for 1 hour or until firm.
Finally remove the popsicle molds from the freezer a final time and evenly pour in the final blueberry layer, then insert the popsicle handles and return to the freezer for an additional hour or until the final layer has set. Keep the popsicles in the freezer to fully freeze until ready to serve.
KEY LIME PIE POPS
This was on the TODAY website, and starts off, “Turn your favorite summer pie into an easy creamy lime and graham cracker frozen treat.
"Technique tip: You don't need fancy ice pop molds to make these pops. Try using basic tools you already have in your kitchen, such as small paper cups, a loaf pan, large ice cube trays or even empty yogurt containers.
“Swap option: To give these pops a chocolaty twist, swap 16 chocolate wafer cookies for the graham crackers.”
To view this online, click here.
Ingredients
6 graham crackers
1/4 cup (1/2 stick) unsalted butter, melted
4 ounces (1/2 package) cream cheese, at room temperature
1/2 cup sweetened condensed milk
1 teaspoon finely grated lime zest
1/4 cup freshly squeezed lime juice
1 cup heavy cream, very cold
Twelve 3-ounce paper cups
12 wooden craft sticks
Preparation
In the bowl of a food processor, pulse the graham crackers to form fine crumbs. Add the butter and pulse to combine.
In the bowl of an electric mixer, using the whisk attachment, beat the cream cheese on low speed until smooth. With the mixer running, gradually add the sweetened condensed milk, then the lime zest and juice.
Add the cream, then increase the speed until mixture is thick and soft peaks form, 3 to 4 minutes. Divide among the cups (about 5 tablespoons per cup). Top with the graham mixture and lightly press down to flatten.
Transfer the cups to a small, rimmed baking sheet and push a craft stick halfway down into each cup. Freeze until firm, at least 6 hours.
When ready to serve, peel the cups away from the pops.
HOMEMADE ROCKY ROAD ICE CREAM
This comes from the almost-infamous long-since-forgotten-email-list. While I don’t remember who sent this to the list, but whoever sent it in wrote, “I love this ice cream, very creamy and I'd say it tastes better than store bought. Hope you like it as much as we do!!” Time: 45 min; 5 min prep; serves 10 - 12
2 cups 2% low-fat milk
2 cups heavy whipping cream
1 cup sugar
1/2 teaspoon salt
1 teaspoon vanilla extract
1 1/2 cups miniature marshmallows (or if you REALLY like them you can use half a bag like I do!)
2/3 cup sliced almonds
1/2 cup unsweetened cocoa
Mix all ingredients together in cylinder of ice cream maker; freeze according to manufacturers directions.
Allow to set in freezer for 2-4 hours.
STRAWBERRY 'ICE CREAM' CAKE
Of course, it does help to have the occasional dessert, right? This one, from page 80 of the March 2016 issue of Vegetarian Times, starts off, “Sssshhh … don’t tell kids this delicious dessert is actually just good-for-them yogurt and fruit with a few graham crackers and waffle cones thrown in for crunch.” I'm not telling, if you're not! Serves 12.
To view this yummy recipe online, go to http://www.vegetariantimes.com/recipe/strawberry-ice-cream-cake/.
15 full graham crackers
5 waffle cones
1 20-oz. bag whole frozen strawberries
1 32-oz. container honey-flavored Greek yogurt
2 Tbs. honey
Line 9-inch springform pan with parchment paper, and set aside.
Pulse graham crackers in food processor with 1 to 2 tsp. water until crumbly and moist. Transfer to bowl.
Pulse waffle cones in food processor until crumbly. Transfer to separate bowl.
Bring strawberries to a simmer in small saucepan over medium heat. Simmer 5 to 10 minutes, or until soft and liquid starts to fill bottom of pan. Cool completely.
Stir together yogurt and honey. Set aside.
Press graham cracker crumbs on bottom of prepared springform pan. Spread half of yogurt, then half of strawberries, then half of crumbled waffle cones in pan. Repeat layering, ending with a sprinkling of waffle cones. Freeze at least 3 hours, or until frozen. Let sit at room temperature 1 hour before serving.
nutritional information Per Per slice: Calories: 250; Protein: 6 g; Total Fat: 8 g; Saturated Fat: 5 g; Carbohydrates: 39 g; Cholesterol: 10 mg; Sodium: 107 mg; Fiber: 2 g; Sugar: 25 g
Found in Loose Cannons: Devastating Dish from the World's Wildest Women, complied by Autumn Stephens, page 21.
I absolutely love ice cream. One of my favorite childhood memories was making homemade ice cream. (Of course, this was using a hand crank ice cream maker. Most ice cream makers now are electric, which is a lot easier on the arms.)
Today's yummy offerings include Key Lime Pie Pops and Homemade Rocky Road Ice Cream. Enjoy!
WATERMELON SORBET
This came from the infamous long-since-forgotten emailing list. Makes 8 servings.
The recipe began, “This fresh sorbet is the perfect dessert for a tropical meal.”
Ingredients
1/2 cup plus 4 cups seeded and pureed watermelon
1/2 cup sugar
2 tablespoons lime juice
1 teaspoon lime zest
Directions
In a small saucepan, bring 1/2 cup watermelon puree and sugar to simmer and remove it from heat. Add lime juice and zest and allow mixture to cool for 20 minutes. Add the 4 cups fresh watermelon puree to melon-lime mixture, then freeze in an ice cream maker according to manufacturer’s instructions.
BEST PINEAPPLE ORANGE SORBET
I don’t know about you, but I’ve been on several bulletin boards over the years (mainly feminist bulletin boards), and find others’ nicknames on the boards interesting. This was posted on a long-since-forgotten-emailing-list by hungry kitten and was from mydailymoment.com. Hungrykitten wrote, “I like this recipe because you don't need an ice cream maker. Cooking time is freezing time.” Time: 2 1/4 hours; 15 min prep; serves 10.
To view this online, click here.
1/2 cup water
1/2 cup granulated sugar
2 cups orange juice
1 tablespoon lemon juice
1 (20 ounce) can pineapple, crushed
2 teaspoons orange zest, freshly grated
In a medium saucepan, bring water and sugar to a simmer over medium high heat until sugar is dissolved.
In a blender, puree pineapple with its juice until smooth. Transfer to a metal bowl, and stir in lemon juice, orange juice, and orange zest. Freeze until slightly firm, but not frozen and process mixture again in the blender until smooth. Transfer to a freezer container and freeze until firm, about 2 hours.
RED, WHITE & BLUE POPSICLES
This is from Matt Abdoo and was posted on the TODAY Show’s site. Matt wrote, “Who doesn't love a popsicle? Especially when it's homemade with real fruit! They're easy to eat, a fun dessert and can be color customized to suit the summer celebration. Technique tip: Use silicone molds that will release the popsicles easy.
“Swap option: Swap out raspberries for strawberries or use frozen fruit.”
Prep Time: 15 minutes; Cook Time 3 hours; Yield: 6 popsicles
To view this online, go to https://www.today.com/recipes/red-white-blue-popsicles-recipe-t154820.
Ingredients
Red Layer
1 1/2 cups fresh strawberries
1 teaspoon cane sugar
White Layer
1 cup coconut milk
1 teaspoon vanilla extract
1 teaspoon cane sugar
Blue Layer
1 1/2 cups fresh blueberries
1 teaspoon cane sugar
Preparation
Place the empty popsicle molds in the freezer.
For the red layer:
Puree the strawberries with the sugar in a blender until smooth. Transfer to a container that is easy to pour out of and reserve.
For the white layer:
Whisk together the coconut milk, sugar and vanilla and transfer to a container that is easy to pour out of and reserve.
For the blue layer:
Puree the blueberries with the sugar in a blender until smooth. Transfer to a container that is easy to pour out of and reserve.
To assemble:
Remove the popsicle molds from the freezer and evenly pour the strawberry puree first into the molds. Place the molds in the freezer and allow freezing for one hour or until firm.
Once the strawberry layer has set up, remove the molds from the freezer and evenly pour in the coconut mixture and return the molds to the freezer and allow freezing for 1 hour or until firm.
Finally remove the popsicle molds from the freezer a final time and evenly pour in the final blueberry layer, then insert the popsicle handles and return to the freezer for an additional hour or until the final layer has set. Keep the popsicles in the freezer to fully freeze until ready to serve.
KEY LIME PIE POPS
This was on the TODAY website, and starts off, “Turn your favorite summer pie into an easy creamy lime and graham cracker frozen treat.
"Technique tip: You don't need fancy ice pop molds to make these pops. Try using basic tools you already have in your kitchen, such as small paper cups, a loaf pan, large ice cube trays or even empty yogurt containers.
“Swap option: To give these pops a chocolaty twist, swap 16 chocolate wafer cookies for the graham crackers.”
To view this online, click here.
Ingredients
6 graham crackers
1/4 cup (1/2 stick) unsalted butter, melted
4 ounces (1/2 package) cream cheese, at room temperature
1/2 cup sweetened condensed milk
1 teaspoon finely grated lime zest
1/4 cup freshly squeezed lime juice
1 cup heavy cream, very cold
Twelve 3-ounce paper cups
12 wooden craft sticks
Preparation
In the bowl of a food processor, pulse the graham crackers to form fine crumbs. Add the butter and pulse to combine.
In the bowl of an electric mixer, using the whisk attachment, beat the cream cheese on low speed until smooth. With the mixer running, gradually add the sweetened condensed milk, then the lime zest and juice.
Add the cream, then increase the speed until mixture is thick and soft peaks form, 3 to 4 minutes. Divide among the cups (about 5 tablespoons per cup). Top with the graham mixture and lightly press down to flatten.
Transfer the cups to a small, rimmed baking sheet and push a craft stick halfway down into each cup. Freeze until firm, at least 6 hours.
When ready to serve, peel the cups away from the pops.
HOMEMADE ROCKY ROAD ICE CREAM
This comes from the almost-infamous long-since-forgotten-email-list. While I don’t remember who sent this to the list, but whoever sent it in wrote, “I love this ice cream, very creamy and I'd say it tastes better than store bought. Hope you like it as much as we do!!” Time: 45 min; 5 min prep; serves 10 - 12
2 cups 2% low-fat milk
2 cups heavy whipping cream
1 cup sugar
1/2 teaspoon salt
1 teaspoon vanilla extract
1 1/2 cups miniature marshmallows (or if you REALLY like them you can use half a bag like I do!)
2/3 cup sliced almonds
1/2 cup unsweetened cocoa
Mix all ingredients together in cylinder of ice cream maker; freeze according to manufacturers directions.
Allow to set in freezer for 2-4 hours.
STRAWBERRY 'ICE CREAM' CAKE
Of course, it does help to have the occasional dessert, right? This one, from page 80 of the March 2016 issue of Vegetarian Times, starts off, “Sssshhh … don’t tell kids this delicious dessert is actually just good-for-them yogurt and fruit with a few graham crackers and waffle cones thrown in for crunch.” I'm not telling, if you're not! Serves 12.
To view this yummy recipe online, go to http://www.vegetariantimes.com/recipe/strawberry-ice-cream-cake/.
15 full graham crackers
5 waffle cones
1 20-oz. bag whole frozen strawberries
1 32-oz. container honey-flavored Greek yogurt
2 Tbs. honey
Line 9-inch springform pan with parchment paper, and set aside.
Pulse graham crackers in food processor with 1 to 2 tsp. water until crumbly and moist. Transfer to bowl.
Pulse waffle cones in food processor until crumbly. Transfer to separate bowl.
Bring strawberries to a simmer in small saucepan over medium heat. Simmer 5 to 10 minutes, or until soft and liquid starts to fill bottom of pan. Cool completely.
Stir together yogurt and honey. Set aside.
Press graham cracker crumbs on bottom of prepared springform pan. Spread half of yogurt, then half of strawberries, then half of crumbled waffle cones in pan. Repeat layering, ending with a sprinkling of waffle cones. Freeze at least 3 hours, or until frozen. Let sit at room temperature 1 hour before serving.
nutritional information Per Per slice: Calories: 250; Protein: 6 g; Total Fat: 8 g; Saturated Fat: 5 g; Carbohydrates: 39 g; Cholesterol: 10 mg; Sodium: 107 mg; Fiber: 2 g; Sugar: 25 g
Wednesday, July 24, 2019
Desserts
Is there anyone who doesn't occasionally love something just a little snacky? Maybe somewhere, someone isn't into desserts and snacks, just no one I know.
For everyone who loves desserts, there's sure to be something in today's post to please, including Philadelphia-Cherry Danish Dessert and Pineapple Cream Pie. Enjoy!
SWIRLED FROZEN YOGURT PIE
This was in a Weight Watchers' email several years ago. The program has changed, but I'm using the values from when this was sent.
This recipe begins, “Substitute your favorite frozen yogurts to create a different pie every time. For more options, swap the yogurt with fat-free varieties of ice cream or Tofutti.”
Was POINTS® value of: 8; Now POINTS® value of: 5; Servings: 8; Preparation Time: 20 min; Cooking Time: 0 min; Level of Difficulty: Easy
Ingredients
1 1/2 cup fat-free chocolate frozen yogurt
1 1/2 cup fat-free vanilla frozen yogurt
1/2 cup mini chocolate chips
6 oz pie crust
1 cup fat-free whipped topping
Directions
In a large bowl, combine both yogurts by gently folding flavors together.
Add chocolate chips. Spoon mixture into prepared crust; cover with plastic wrap and freeze until firm, about 2 hours.
Top with whipped topping before serving. Slice into 8 pieces.
Chef Tips We renovated Swirled Frozen Yogurt Pie by:
Using fat-free frozen yogurt instead of ice cream.
Using fat-free whipped topping instead of regular topping.
SILKY CHOCOLATE PEANUT BUTTER PIE
This comes from Genius Kitchen, and is worth trying. (Hint: Check out the website!) This is ready in 10 minutes and serves 8.
To view this online, click here.
Ingredients
1 cup chocolate chips
16 ounces soft silken tofu, drained
2⁄3 cup creamy peanut butter
1⁄2 cup sugar
1⁄2 teaspoon vanilla
1 prepared graham cracker crust
Directions
Melt chocolate chips in a small bowl in microwave at high power 90 seconds.
Stir until smooth.
Cool slightly.
Place tofu, peanut butter, sugar & vanilla in blender or food processor and whirl until smooth.
Add chocolate and whirl until combined.
Pour into crust.
Cover with plastic wrap and refrigerate several hours until filling is set.
Can garnish with peanuts, melted chocolate or whipped cream.
PHILADELPHIA-CHERRY DANISH DESSERT
This is from Kraft, and begins, “Skip the line at the bakeshop and make your own cherry Danish dessert! These PHILADELPHIA-Cherry Danish Dessert squares take just 15 minutes of prep.” Very yummy!
Prep Time: 14 minutes; Cook Time: 45 minutes; Total Time: 1 hour; Makes: 24 Servings.
To view this online, click here.
Ingredients
2 cans (8 oz. each) refrigerated crescent dinner rolls, divided
2 pkg. (8 oz. each) PHILADELPHIA Cream Cheese, softened
1-1/2 cups powdered sugar, divided
1 egg white
1 tsp. vanilla
1 can (20 oz.) cherry pie filling
3 Tbsp. milk
Directions
Heat oven to 350°F.
Unroll 1 can crescent dough into 2 rectangles; press onto bottom of 13x9-inch pan sprayed with cooking spray, firmly pressing perforations and seams together to seal.
Beat cream cheese, 3/4 cup sugar, egg white and vanilla with mixer until blended; spread onto crust. Cover with pie filling.
Unroll remaining can of crescent dough into 2 rectangles; pat into 13x9-inch rectangle, firmly pressing perforations and seams together seal. Place over pie filling.
Bake 25 to 30 min. or until golden brown; cool slightly.
Mix milk and remaining sugar until blended; drizzle over dessert.
BOMBOLONI
This comes from John Alberti and was posted on the TODAY Show website. John wrote, “Bomboloni are Italian doughnuts, and they are as much fun to say as they are to make and eat. They are like a party in your mouth, with their gooey centers and sugary, soft dough.
“Swap option: They are delightful even without a filling, but if you fill them with chocolate-hazelnut spread, jam or pastry cream.”
Cook Time: 5 minutes; Prep Time: 2 hours; Servings: 10. Special equipment: Round pastry cutter.
To view this online, go to https://www.today.com/recipes/bomboloni-recipe-t150524.
Ingredients
3 cups bread or all-purpose flour
2 1/4 teaspoons fast-acting dry yeast
2 teaspoons salt
1/4 cup granulated sugar, plus more for coating
1 lemon, zested
2 eggs, lightly beaten
3/4 cup whole milk
1/2 stick (4 tablespoons) butter, softened
1 teaspoon vanilla extract
Vegetable oil, for frying
Chocolate-hazelnut spread, jam or pastry cream, for filling
Directions
In a large bowl, or the bowl of a stand mixer fitted with a dough hook, combine the flour, yeast, salt, sugar, and lemon zest. Then add the eggs, milk, butter and vanilla extract, and mix well. Knead the dough in the stand mixer for 2 minutes, or if making the dough by hand, tip it onto a floured work surface and knead for about 5 minutes, until it's smooth and elastic but still quite sticky. Transfer the dough to a large, lightly oiled bowl. Cover with plastic wrap and allow to rise in a warm place for 1 hour or until doubled in size.
Using a rolling pin, roll out the dough until about 3/4 inch thick. Then, using a round pastry cutter the size of a cup, cut the dough into disks. Place the dough on a baking sheet lined with parchment paper, and cover with plastic wrap. Allow to rise for another hour.
Heat oil in a large, deep pan to 350 F. Fry the doughnuts, in batches, for 4-5 minutes, turning halfway through the cooking time, until golden brown. Remove with a slotted spoon and drain on paper towels. Dredge the doughnuts in granulated sugar until completely covered.
Spoon the filling of your choice into a piping bag fitted with a medium nozzle. Make a small hole in the side of each doughnut, push in the nozzle and squeeze to fill the bomboloni. Serve warm.
PINEAPPLE CREAM PIE
This is another one of those gems from the infamous long-since-forgotten emailing lists.
Ingredients
1 graham cracker crust or pre-baked regular crust
8 ounces cream cheese, softened
1 can sweetened condensed milk
1 large can crushed pineapple, well drained
1/2 to 1 cup chopped pecans
Directions
Beat cream cheese until fluffy. Beat in sweetened condensed milk. Stir in pineapple and pecans. Put into pie crust and top with whipped cream or Cool Whip. Refrigerate for several hours.
APPLE SPICE CAKE WITH VANILLA BUTTER SAUCE
Here's another recipe from the infamous long-since-forgotten emailing list. Makes 10 servings.
Ingredients
1 cup flour
1 tablespoon Apple Pie Spice
1 teaspoon Ground Allspice
1/2 teaspoon salt
1/2 cup (1 stick) butter, softened
1 cup firmly packed light brown sugar
2 eggs
2 teaspoons Pure Vanilla Extract
2 apples (Granny Smith or Gala), peeled and chopped (about 2 cups)
1/2 cup raisins
1/2 cup chopped walnuts
Vanilla Butter Sauce (recipe follows)
Directions
Preheat oven to 350°F. Mix flour, apple pie spice, allspice and salt in small bowl; set aside.
Beat butter and sugar in large bowl with mixer on medium speed 5 minutes or until light and fluffy. Beat in eggs and vanilla on low speed just until blended. Gradually beat in flour mixture, beating well after each addition. Stir in apples, raisins and walnuts. Spread evenly in greased 9-inch round cake pan.
Bake 35 to 40 minutes or until toothpick inserted in center comes out clean. Cool in pan 10 minutes. Invert cake onto serving plate.
Serve warm with Vanilla Butter Sauce.
Vanilla Butter Sauce:
Bring 1 cup firmly packed brown sugar, 1/2 cup (1 stick) butter and 1/2 cup heavy cream to boil in 2-quart saucepan on medium heat. Reduce heat and simmer 10 minutes or until slightly thickened. Remove from heat. Stir in 2 tablespoons Pure Vanilla Extract. Serve warm. Makes about 1 1/2 cups.
Test Kitchen Tip: The cake and sauce can be prepared and refrigerated separately the day before. Warm the cake in the oven and the sauce on top of the stove before serving.
For everyone who loves desserts, there's sure to be something in today's post to please, including Philadelphia-Cherry Danish Dessert and Pineapple Cream Pie. Enjoy!
SWIRLED FROZEN YOGURT PIE
This was in a Weight Watchers' email several years ago. The program has changed, but I'm using the values from when this was sent.
This recipe begins, “Substitute your favorite frozen yogurts to create a different pie every time. For more options, swap the yogurt with fat-free varieties of ice cream or Tofutti.”
Was POINTS® value of: 8; Now POINTS® value of: 5; Servings: 8; Preparation Time: 20 min; Cooking Time: 0 min; Level of Difficulty: Easy
Ingredients
1 1/2 cup fat-free chocolate frozen yogurt
1 1/2 cup fat-free vanilla frozen yogurt
1/2 cup mini chocolate chips
6 oz pie crust
1 cup fat-free whipped topping
Directions
In a large bowl, combine both yogurts by gently folding flavors together.
Add chocolate chips. Spoon mixture into prepared crust; cover with plastic wrap and freeze until firm, about 2 hours.
Top with whipped topping before serving. Slice into 8 pieces.
Chef Tips We renovated Swirled Frozen Yogurt Pie by:
Using fat-free frozen yogurt instead of ice cream.
Using fat-free whipped topping instead of regular topping.
SILKY CHOCOLATE PEANUT BUTTER PIE
This comes from Genius Kitchen, and is worth trying. (Hint: Check out the website!) This is ready in 10 minutes and serves 8.
To view this online, click here.
Ingredients
1 cup chocolate chips
16 ounces soft silken tofu, drained
2⁄3 cup creamy peanut butter
1⁄2 cup sugar
1⁄2 teaspoon vanilla
1 prepared graham cracker crust
Directions
Melt chocolate chips in a small bowl in microwave at high power 90 seconds.
Stir until smooth.
Cool slightly.
Place tofu, peanut butter, sugar & vanilla in blender or food processor and whirl until smooth.
Add chocolate and whirl until combined.
Pour into crust.
Cover with plastic wrap and refrigerate several hours until filling is set.
Can garnish with peanuts, melted chocolate or whipped cream.
PHILADELPHIA-CHERRY DANISH DESSERT
This is from Kraft, and begins, “Skip the line at the bakeshop and make your own cherry Danish dessert! These PHILADELPHIA-Cherry Danish Dessert squares take just 15 minutes of prep.” Very yummy!
Prep Time: 14 minutes; Cook Time: 45 minutes; Total Time: 1 hour; Makes: 24 Servings.
To view this online, click here.
Ingredients
2 cans (8 oz. each) refrigerated crescent dinner rolls, divided
2 pkg. (8 oz. each) PHILADELPHIA Cream Cheese, softened
1-1/2 cups powdered sugar, divided
1 egg white
1 tsp. vanilla
1 can (20 oz.) cherry pie filling
3 Tbsp. milk
Directions
Heat oven to 350°F.
Unroll 1 can crescent dough into 2 rectangles; press onto bottom of 13x9-inch pan sprayed with cooking spray, firmly pressing perforations and seams together to seal.
Beat cream cheese, 3/4 cup sugar, egg white and vanilla with mixer until blended; spread onto crust. Cover with pie filling.
Unroll remaining can of crescent dough into 2 rectangles; pat into 13x9-inch rectangle, firmly pressing perforations and seams together seal. Place over pie filling.
Bake 25 to 30 min. or until golden brown; cool slightly.
Mix milk and remaining sugar until blended; drizzle over dessert.
BOMBOLONI
This comes from John Alberti and was posted on the TODAY Show website. John wrote, “Bomboloni are Italian doughnuts, and they are as much fun to say as they are to make and eat. They are like a party in your mouth, with their gooey centers and sugary, soft dough.
“Swap option: They are delightful even without a filling, but if you fill them with chocolate-hazelnut spread, jam or pastry cream.”
Cook Time: 5 minutes; Prep Time: 2 hours; Servings: 10. Special equipment: Round pastry cutter.
To view this online, go to https://www.today.com/recipes/bomboloni-recipe-t150524.
Ingredients
3 cups bread or all-purpose flour
2 1/4 teaspoons fast-acting dry yeast
2 teaspoons salt
1/4 cup granulated sugar, plus more for coating
1 lemon, zested
2 eggs, lightly beaten
3/4 cup whole milk
1/2 stick (4 tablespoons) butter, softened
1 teaspoon vanilla extract
Vegetable oil, for frying
Chocolate-hazelnut spread, jam or pastry cream, for filling
Directions
In a large bowl, or the bowl of a stand mixer fitted with a dough hook, combine the flour, yeast, salt, sugar, and lemon zest. Then add the eggs, milk, butter and vanilla extract, and mix well. Knead the dough in the stand mixer for 2 minutes, or if making the dough by hand, tip it onto a floured work surface and knead for about 5 minutes, until it's smooth and elastic but still quite sticky. Transfer the dough to a large, lightly oiled bowl. Cover with plastic wrap and allow to rise in a warm place for 1 hour or until doubled in size.
Using a rolling pin, roll out the dough until about 3/4 inch thick. Then, using a round pastry cutter the size of a cup, cut the dough into disks. Place the dough on a baking sheet lined with parchment paper, and cover with plastic wrap. Allow to rise for another hour.
Heat oil in a large, deep pan to 350 F. Fry the doughnuts, in batches, for 4-5 minutes, turning halfway through the cooking time, until golden brown. Remove with a slotted spoon and drain on paper towels. Dredge the doughnuts in granulated sugar until completely covered.
Spoon the filling of your choice into a piping bag fitted with a medium nozzle. Make a small hole in the side of each doughnut, push in the nozzle and squeeze to fill the bomboloni. Serve warm.
PINEAPPLE CREAM PIE
This is another one of those gems from the infamous long-since-forgotten emailing lists.
Ingredients
1 graham cracker crust or pre-baked regular crust
8 ounces cream cheese, softened
1 can sweetened condensed milk
1 large can crushed pineapple, well drained
1/2 to 1 cup chopped pecans
Directions
Beat cream cheese until fluffy. Beat in sweetened condensed milk. Stir in pineapple and pecans. Put into pie crust and top with whipped cream or Cool Whip. Refrigerate for several hours.
APPLE SPICE CAKE WITH VANILLA BUTTER SAUCE
Here's another recipe from the infamous long-since-forgotten emailing list. Makes 10 servings.
Ingredients
1 cup flour
1 tablespoon Apple Pie Spice
1 teaspoon Ground Allspice
1/2 teaspoon salt
1/2 cup (1 stick) butter, softened
1 cup firmly packed light brown sugar
2 eggs
2 teaspoons Pure Vanilla Extract
2 apples (Granny Smith or Gala), peeled and chopped (about 2 cups)
1/2 cup raisins
1/2 cup chopped walnuts
Vanilla Butter Sauce (recipe follows)
Directions
Preheat oven to 350°F. Mix flour, apple pie spice, allspice and salt in small bowl; set aside.
Beat butter and sugar in large bowl with mixer on medium speed 5 minutes or until light and fluffy. Beat in eggs and vanilla on low speed just until blended. Gradually beat in flour mixture, beating well after each addition. Stir in apples, raisins and walnuts. Spread evenly in greased 9-inch round cake pan.
Bake 35 to 40 minutes or until toothpick inserted in center comes out clean. Cool in pan 10 minutes. Invert cake onto serving plate.
Serve warm with Vanilla Butter Sauce.
Vanilla Butter Sauce:
Bring 1 cup firmly packed brown sugar, 1/2 cup (1 stick) butter and 1/2 cup heavy cream to boil in 2-quart saucepan on medium heat. Reduce heat and simmer 10 minutes or until slightly thickened. Remove from heat. Stir in 2 tablespoons Pure Vanilla Extract. Serve warm. Makes about 1 1/2 cups.
Test Kitchen Tip: The cake and sauce can be prepared and refrigerated separately the day before. Warm the cake in the oven and the sauce on top of the stove before serving.
Tuesday, July 23, 2019
Mac and Cheese - Double-Post Tuesday
Besides being Taco Tuesday, it's also Double-Post Tuesday. Today's double post deals with that iconic comfort food, Macaroni and Cheese. I've posted my Grandma's Mac and Cheese and Apple-Cheddar Mac and Cheese, as well as four other mac and cheese recipes. Enjoy!
HOMEMADE MACARONI AND CHEESE
I had been looking for a really simple but good homemade macaroni and cheese recipe, and this fits the bill. My daughter and granddaughter had come over on my granddaughter's birthday; while they were here, my daughter whipped up this recipe. She'd been making it for quite a while. It was a definite hit with everyone in the house.
1 box (16 ounce) cannelloni pasta (see Note)
3 tablespoons butter
3 tablespoons flour
2 cups milk
2 cups shredded cheddar cheese
Salt and pepper, to taste
Note: Just about any tubular pasta can be used in this recipe, though it seems to work best with something bigger than elbow macaroni. Some of the better substitutes for the cannelloni would be ziti, penne, rigatoni, or elicoidali.
Turn oven on to 350 degrees.
Cook pasta according to package directions. If the package gives you a bracket – say, 12 – 14 minutes – lean toward the lower time, since you don't want the pasta to be too mushy. Drain, rinse, and set aside.
In a large pot, melt butter on low heat, then add flour, salt, and pepper. Cook on low heat, stirring continuously, for 2 to 3 minutes. Add milk and cook on medium heat for approximately 5 minutes until mixture thickens, stirring continuously.
Remove from heat and add macaroni, stirring it into mixture. Add the shredded cheese, and stir in completely.
Pour mixture into a 13 X 9 inch pan and bake at 350 for 10 – 15 minutes. Remove carefully, as it will be hot. (You knew that, right?) Dig in.
This makes 4 – 5 servings.
Photo: Homemade Macaroni and Cheese, on the left in the blue dish, and Benecol Macaroni and Cheese, on right, in orange casserole dish (from Avon)

BENECOL MACARONI AND CHEESE
For several years, there was a magazine dedicated to walking, titled Walking Magazine. It had many good articles, tips and recipes for those of us who feel a little more comfortable race-walking than running. Unfortunately, the magazine folded several years ago. This recipe was in it during its final year. Serves 4.
1/2 lb. small shell style macaroni
4 Tbs. Benecol
3 Tbs. all purpose flour
3 Tbs. finely chopped onion
1 1/2 C 2% milk, warmed
few drops Tabasco Sauce
1-pint nonfat cottage (or ricotta) cheese
1 tsp. salt
1/2 C flavored bread crumbs
1 Tbs. olive oil
Preheat oven to 375 degrees. Spray a 9-by-9 inch pan liberally with nonstick cooking spray. Cook shells according to package directions, strain, and rinse with cold water. Set aside.
To prepare sauce, melt Benecol in 2-quart saucepan over medium heat. Quickly whisk in flour, add onions, and cook for 1 minute. Slowly pour milk into flour mixture, whisking constantly to avoid lumps. Add Tabasco Sauce and cook an additional minute. Whisk in cheese and salt, and blend in shells; transfer mixture to prepared pan.
In small bowl, mix oil and bread crumbs together; spoon over top of macaroni and cheese. Bake for 20 minutes.
Per Serving: 510 calories; 27.2% calories from fat; 3G saturated fat; 65G carbohydrates; 12MG cholesterol; 612MG sodium; 2G fiber
GRANDMA'S MAC AND CHEESE
This comes from my e-cookbook, titled Off the Wall Cooking, found on Amazon.com.
Both of my grandmas were characters—I could write a book about either one. This is my dad's mom's version of the ultimate comfort food. She told me she made this for my dad and my uncle when they were kids. Very simple, but very good.
1 lb. elbow macaroni
1 – 2 jars of Cheese Whiz
Cook macaroni according to package directions. Heat Cheese Whiz, either in microwave or boiling water. (Remove lids from jars first.) Drain macaroni, dump into a large bowl, add heated Cheese Whiz, stir, and PIG OUT!!!
BAKED MACARONI AND CHEESE
This came from a Weight Watchers email list maybe a decade or more ago. The points value is from then.
Serves: 8; 5 points
Ingredients
12 oz uncooked macaroni, elbow-type
1/2 cup fat-free sour cream
12 oz fat-free evaporated milk
8 oz low-fat cheddar or Colby cheese, shredded
1 Tbsp Dijon mustard
1/4 tsp table salt
1/4 tsp black pepper
1/8 tsp ground nutmeg
2 Tbsp dried bread crumbs
2 Tbsp grated Parmesan cheese
Directions
Preheat oven to 350ºF.
Cook pasta according to package directions without added fat or salt; drain & transfer to a large bowl. While pasta is still hot, stir in sour cream; set aside.
Heat milk in small saucepan over medium heat until tiny bubbles appear just around the edges. Reduce heat to low, add cheese & simmer until cheese melts, stirring constantly with wire whisk, about 2 minutes; remove from heat & stir in mustard, salt, pepper & nutmeg.
Add cheese mixture to pasta; mix well. Transfer to a 4-quart casserole dish. Combine bread crumbs & Parmesan cheese; sprinkle over pasta. Bake until top is golden, about 30 minutes. Yields about 1 cup per serving.
SLOWCOOKER MACARONI AND CHEESE
This came from the infamous long-since-forgotten emailing list. Makes 4 servings. Time to make: 1 1/2 hours; Prep: 20 min
Ingredients
3/4 finely chopped onion
3/4 finely chopped green bell pepper
3 1/2 cups hot cooked elbow macaroni (about 1 1/2 cups uncooked)
1 tablespoon all-purpose flour
1/2 teaspoon dry mustard
1/8 teaspoon salt
1/8 teaspoon pepper
1/8 teaspoon fresh ground red pepper
1 1/2 cups 1% low-fat milk
1 cup shredded cheddar cheese
2 ounces processed cheese (Velveeta)
1 (2 ounce) jar diced pimentos, drained
Directions
Coat large nonstick skillet with cooking spray; place over medium-high heat until hot. Add onion and bell pepper; sauté 5 minutes or until tender. Place onion mixture and macaroni in 3-quart electric slow cooker coated with cooking spray.
Place flour and next 4 ingredients in small bowl; gradually add milk, stirring with whisk until well blended. Add milk mixture, cheeses, and pimiento to slow cooker; stir well. Cover lid; cook on high-heat setting 1-1/2 hours or until thick and creamy, stirring after 1 hour.
APPLE-CHEDDAR MAC AND CHEESE
This comes from FamilyTime, and begins, “Raise your hand if you like mac and cheese? And when it's teamed with apples, you'll want to raise both hands!” Serves: 4; Prep Time: 25 to 30 minutes; Cook Time: 30 minutes.
To view this online, click here.
Ingredients
1 1/4 cups dry elbow macaroni
1 1/2 cups small diced, unpeeled, tart green or red apples
2 tablespoons butter
1/4 cup finely chopped onion
2 tablespoons all-purpose flour
2 1/4 cups whole milk, lower fat milk can be substituted
1 small bay leaf
2 1/3 cup shredded sharp white or yellow Cheddar cheese
1/2 teaspoon dry sherry (see second note)
Salt to taste
Ground white pepper to taste
1/3 cup panko bread crumbs, regular bread crumbs can be substituted
Directions
Butter a 1 1/2-quart round casserole.
Cook the pasta in a large saucepan according to package directions until al dente. Rinse with cold water to stop the cooking and drain well. Return the pasta to the saucepan and add the apples.
Meanwhile, melt the butter in a heavy saucepan. Add the onions and cook over medium heat for about 3 minutes or until tender. Add the flour and cook, stirring, for about 1 minute or until fragrant. Slowly add the milk, whisking constantly until simmering gently. Add the bay leaf, reduce the heat to low and cook, stirring, for 10 minutes.
Preheat the oven to 350°F.
Remove and discard the bay leaf and then stir 2 cups of the cheese and the sherry into the milk. Cook for 1 to 2 minutes, stirring until the cheese melts. Remove the pan from heat and season to taste with salt and pepper.
Add the cheese sauce to the pasta and apples and stir gently to combine. Transfer the mac and cheese to the casserole and sprinkle with the remaining cheese and the panko. Bake, uncovered, for about 30 minutes or just until heated through and lightly browned. Let stand for about 5 minutes before serving.
Note: You can bake the mac and cheese in individual ramekins. Butter them and bake for about 15 minutes.
Note: If you’re like me and don’t have alcohol around the house, no worries. Omit the Sherry, or add 1/2 teaspoon of milk or water with the cheese.
Per Serving: 600 calories; 33 g fat; 20 g saturated fat; 100 mg cholesterol; 660 mg sodium; 48 g carbohydrate; 3 g fiber; 27g protein
HOMEMADE MACARONI AND CHEESE
I had been looking for a really simple but good homemade macaroni and cheese recipe, and this fits the bill. My daughter and granddaughter had come over on my granddaughter's birthday; while they were here, my daughter whipped up this recipe. She'd been making it for quite a while. It was a definite hit with everyone in the house.
1 box (16 ounce) cannelloni pasta (see Note)
3 tablespoons butter
3 tablespoons flour
2 cups milk
2 cups shredded cheddar cheese
Salt and pepper, to taste
Note: Just about any tubular pasta can be used in this recipe, though it seems to work best with something bigger than elbow macaroni. Some of the better substitutes for the cannelloni would be ziti, penne, rigatoni, or elicoidali.
Turn oven on to 350 degrees.
Cook pasta according to package directions. If the package gives you a bracket – say, 12 – 14 minutes – lean toward the lower time, since you don't want the pasta to be too mushy. Drain, rinse, and set aside.
In a large pot, melt butter on low heat, then add flour, salt, and pepper. Cook on low heat, stirring continuously, for 2 to 3 minutes. Add milk and cook on medium heat for approximately 5 minutes until mixture thickens, stirring continuously.
Remove from heat and add macaroni, stirring it into mixture. Add the shredded cheese, and stir in completely.
Pour mixture into a 13 X 9 inch pan and bake at 350 for 10 – 15 minutes. Remove carefully, as it will be hot. (You knew that, right?) Dig in.
This makes 4 – 5 servings.
Photo: Homemade Macaroni and Cheese, on the left in the blue dish, and Benecol Macaroni and Cheese, on right, in orange casserole dish (from Avon)
BENECOL MACARONI AND CHEESE
For several years, there was a magazine dedicated to walking, titled Walking Magazine. It had many good articles, tips and recipes for those of us who feel a little more comfortable race-walking than running. Unfortunately, the magazine folded several years ago. This recipe was in it during its final year. Serves 4.
1/2 lb. small shell style macaroni
4 Tbs. Benecol
3 Tbs. all purpose flour
3 Tbs. finely chopped onion
1 1/2 C 2% milk, warmed
few drops Tabasco Sauce
1-pint nonfat cottage (or ricotta) cheese
1 tsp. salt
1/2 C flavored bread crumbs
1 Tbs. olive oil
Preheat oven to 375 degrees. Spray a 9-by-9 inch pan liberally with nonstick cooking spray. Cook shells according to package directions, strain, and rinse with cold water. Set aside.
To prepare sauce, melt Benecol in 2-quart saucepan over medium heat. Quickly whisk in flour, add onions, and cook for 1 minute. Slowly pour milk into flour mixture, whisking constantly to avoid lumps. Add Tabasco Sauce and cook an additional minute. Whisk in cheese and salt, and blend in shells; transfer mixture to prepared pan.
In small bowl, mix oil and bread crumbs together; spoon over top of macaroni and cheese. Bake for 20 minutes.
Per Serving: 510 calories; 27.2% calories from fat; 3G saturated fat; 65G carbohydrates; 12MG cholesterol; 612MG sodium; 2G fiber
GRANDMA'S MAC AND CHEESE
This comes from my e-cookbook, titled Off the Wall Cooking, found on Amazon.com.
Both of my grandmas were characters—I could write a book about either one. This is my dad's mom's version of the ultimate comfort food. She told me she made this for my dad and my uncle when they were kids. Very simple, but very good.
1 lb. elbow macaroni
1 – 2 jars of Cheese Whiz
Cook macaroni according to package directions. Heat Cheese Whiz, either in microwave or boiling water. (Remove lids from jars first.) Drain macaroni, dump into a large bowl, add heated Cheese Whiz, stir, and PIG OUT!!!
BAKED MACARONI AND CHEESE
This came from a Weight Watchers email list maybe a decade or more ago. The points value is from then.
Serves: 8; 5 points
Ingredients
12 oz uncooked macaroni, elbow-type
1/2 cup fat-free sour cream
12 oz fat-free evaporated milk
8 oz low-fat cheddar or Colby cheese, shredded
1 Tbsp Dijon mustard
1/4 tsp table salt
1/4 tsp black pepper
1/8 tsp ground nutmeg
2 Tbsp dried bread crumbs
2 Tbsp grated Parmesan cheese
Directions
Preheat oven to 350ºF.
Cook pasta according to package directions without added fat or salt; drain & transfer to a large bowl. While pasta is still hot, stir in sour cream; set aside.
Heat milk in small saucepan over medium heat until tiny bubbles appear just around the edges. Reduce heat to low, add cheese & simmer until cheese melts, stirring constantly with wire whisk, about 2 minutes; remove from heat & stir in mustard, salt, pepper & nutmeg.
Add cheese mixture to pasta; mix well. Transfer to a 4-quart casserole dish. Combine bread crumbs & Parmesan cheese; sprinkle over pasta. Bake until top is golden, about 30 minutes. Yields about 1 cup per serving.
SLOWCOOKER MACARONI AND CHEESE
This came from the infamous long-since-forgotten emailing list. Makes 4 servings. Time to make: 1 1/2 hours; Prep: 20 min
Ingredients
3/4 finely chopped onion
3/4 finely chopped green bell pepper
3 1/2 cups hot cooked elbow macaroni (about 1 1/2 cups uncooked)
1 tablespoon all-purpose flour
1/2 teaspoon dry mustard
1/8 teaspoon salt
1/8 teaspoon pepper
1/8 teaspoon fresh ground red pepper
1 1/2 cups 1% low-fat milk
1 cup shredded cheddar cheese
2 ounces processed cheese (Velveeta)
1 (2 ounce) jar diced pimentos, drained
Directions
Coat large nonstick skillet with cooking spray; place over medium-high heat until hot. Add onion and bell pepper; sauté 5 minutes or until tender. Place onion mixture and macaroni in 3-quart electric slow cooker coated with cooking spray.
Place flour and next 4 ingredients in small bowl; gradually add milk, stirring with whisk until well blended. Add milk mixture, cheeses, and pimiento to slow cooker; stir well. Cover lid; cook on high-heat setting 1-1/2 hours or until thick and creamy, stirring after 1 hour.
APPLE-CHEDDAR MAC AND CHEESE
This comes from FamilyTime, and begins, “Raise your hand if you like mac and cheese? And when it's teamed with apples, you'll want to raise both hands!” Serves: 4; Prep Time: 25 to 30 minutes; Cook Time: 30 minutes.
To view this online, click here.
Ingredients
1 1/4 cups dry elbow macaroni
1 1/2 cups small diced, unpeeled, tart green or red apples
2 tablespoons butter
1/4 cup finely chopped onion
2 tablespoons all-purpose flour
2 1/4 cups whole milk, lower fat milk can be substituted
1 small bay leaf
2 1/3 cup shredded sharp white or yellow Cheddar cheese
1/2 teaspoon dry sherry (see second note)
Salt to taste
Ground white pepper to taste
1/3 cup panko bread crumbs, regular bread crumbs can be substituted
Directions
Butter a 1 1/2-quart round casserole.
Cook the pasta in a large saucepan according to package directions until al dente. Rinse with cold water to stop the cooking and drain well. Return the pasta to the saucepan and add the apples.
Meanwhile, melt the butter in a heavy saucepan. Add the onions and cook over medium heat for about 3 minutes or until tender. Add the flour and cook, stirring, for about 1 minute or until fragrant. Slowly add the milk, whisking constantly until simmering gently. Add the bay leaf, reduce the heat to low and cook, stirring, for 10 minutes.
Preheat the oven to 350°F.
Remove and discard the bay leaf and then stir 2 cups of the cheese and the sherry into the milk. Cook for 1 to 2 minutes, stirring until the cheese melts. Remove the pan from heat and season to taste with salt and pepper.
Add the cheese sauce to the pasta and apples and stir gently to combine. Transfer the mac and cheese to the casserole and sprinkle with the remaining cheese and the panko. Bake, uncovered, for about 30 minutes or just until heated through and lightly browned. Let stand for about 5 minutes before serving.
Note: You can bake the mac and cheese in individual ramekins. Butter them and bake for about 15 minutes.
Note: If you’re like me and don’t have alcohol around the house, no worries. Omit the Sherry, or add 1/2 teaspoon of milk or water with the cheese.
Per Serving: 600 calories; 33 g fat; 20 g saturated fat; 100 mg cholesterol; 660 mg sodium; 48 g carbohydrate; 3 g fiber; 27g protein
Taco Tuesday
It's time for another Taco Tuesday. (Yum!) Today's offerings include Gluten-Free Egg and Black Bean Breakfast Tacos and Ice Cream Tacos. (Yes, you read that right! Do I have your attention yet?) Enjoy!
CRISPY VEGETARIAN TACOS
This yummy taco recipe comes from Kraft, and begins, “Make next Monday the most delicious meat-free Monday ever with these Crispy Vegetarian Tacos. Explore the recipe to learn more about these tasty tacos.” Of course, you can also use this for Taco Tuesday!
Prep Time: 25min.; Total Time: 25min.; Servings: 6 servings, 2 tacos each
To view this recipe online, click here.
Ingredients
1 Tbsp. oil
1 Tbsp. KRAFT Zesty Italian Dressing
1/2 cup chopped onions
1-1/2 cups frozen whole kernel corn
1 can (15 oz.) black beans, rinsed
12 TACO BELL® Crunchy Taco Shells, warmed
2 cups shredded iceberg lettuce
1 tomato, seeded, finely chopped
2 green onions, chopped
1 cup KRAFT Mexican Style Shredded Four Cheese with a TOUCH OF PHILADELPHIA
Directions
Heat oil and dressing in large skillet on medium-high heat. Add onions; cook and stir 5 min. or until lightly browned. Add corn; cook 2 min., stirring occasionally. Stir in beans; cook and stir 1 to 2 min. or until mixture is heated through.
Fill taco shells with lettuce, bean mixture and remaining ingredients.
ICE CREAM TACOS
I can hear it now: Ice cream tacos??? Are you crazy?
Well, maybe. But this recipe is definitely something that makes for a perfect dessert – especially on Taco Tuesday.
This is from Leah Maroney, who, besides writing for The Spruce Eats, has her own blog, Mini Pie Kitchen.
For this recipe, Leah wrote, “Move over Choco Tacos, these homemade ice cream tacos are in town. You only need flour tortillas, ice cream, and chocolate chips to make these babies a reality.
“Get a little crazy and make your own ice cream or your own waffle cone shells. Or keep it simple and use the store-bought kinds. You really can't go wrong.
“Ice cream tacos are a fun party treat or spin on popular on-the-go ice creams. Just make sure to serve and eat them quickly!”
Total: 4 hrs 35 mins; Prep: 4 hrs 35 mins;Cook: 0 mins; Yield: 6 ice cream tacos (serves 6)
To view this online, click here.
Ingredients
6 flour tortillas (6-inch)
3 tablespoons butter
1 tablespoon sugar
10 ounces semisweet chocolate chips
6 scoops vanilla ice cream (or other ice cream of your choice)
Garnish: sprinkles
Directions
Preheat the oven to 350 F.
Line a baking sheet with parchment paper. Make 6 foil logs that are large enough so that the tortillas can drape over them to form a taco shell shape. Lay them on the parchment paper and drape the tortillas over each log.
Melt the butter in the microwave. Brush the butter over the top of each tortilla. Then sprinkle each tortilla with the sugar.
Place the baking sheet in the oven and bake for about 10 minutes or until lightly browned.
Remove them from the oven and allow to cool. Then place the baking sheet in the freezer for about 15 minutes or until very cold.
Melt the chocolate chips and coconut oil in the microwave in a microwave safe bowl for 30 second increments, stirring in between until it is completely smooth and melted.
Remove the bowl from the microwave and brush the melted chocolate on the inside of each shell until coated. Place the shells back in the freezer and freeze for another 10 to 15 minutes, or until the chocolate has hardened completely.
While the shells are hardening again, take the ice cream out of the freezer and allow it to soften slightly. Fill each shell with a large scoop of ice cream to the top edge of the shell. Squeeze the shell slightly to disperse the ice cream, being careful not to break the shell.
Place it back onto the baking sheet and freeze again for 1 to 2 hours, until very firm.
Reheat the chocolate in 30 second increments until melted. Pour it into a loaf pan. Dip the top of each taco in the chocolate quickly, covering the ice cream and the top edges of the shell. You need to work quickly so that the ice cream does not mess. Spoon more onto the top of the tacos if needed and then sprinkle generously with sprinkles.
Place them back on the parchment paper and freeze again until the chocolate is completely hardened and then serve!
GLUTEN-FREE EGG AND BLACK BEAN BREAKFAST TACOS
This comes from Kaleigh McMordie, MCN, RDN, LD at VeryWellFit. Kaleigh wrote, “Did you know that corn tortillas are actually considered a whole grain? They are also low in sodium, so they make a great base for healthy breakfast tacos.
“Fried potatoes, meats like bacon and sausage, and cheese can quickly add up when it comes to sodium and saturated fat. These tacos have none of that. Instead, try adding sauteed vegetables, beans, and creamy avocado to your eggs for healthy and flavorful tacos that will have you feeling good all morning long.
“These breakfast tacos are gluten-free and vegetarian, and can be made dairy-free if you leave out the milk or use a milk substitute. If you have other vegetables that need to be used up, feel free to add them in with the onions and jalapeno. Top with your favorite salsa for a flavorful and delicious breakfast.”
Prep Time: 10 minutes; Cook Time: 10 minutes; Total Time: 20 minutes; Servings: 2 (1 taco each).
To view this recipe online, click here.
Ingredients
olive oil spray
2 tablespoons onion, diced
1 tablespoon jalapeno, diced
1/4 cup low sodium black beans
1 large egg
1 tablespoon skim milk
2 corn tortillas
1/4 small avocado, sliced
1 tablespoon cilantro
Directions
Heat a small nonstick skillet over medium heat and spray with oil. Add onions and jalapeno and cook, stirring, until softened, about three minutes. Add black beans and continue cooking until heated through. Remove from skillet and wipe clean.
Turn heat to low and spray skillet with oil again. Whisk together egg and milk. Pour into pan and cook, stirring, until eggs are set.
In a separate pan, heat tortillas over low heat. Divide eggs and bean mixture between the tortillas. Top with avocado and cilantro. Serve.
Ingredient Variations and Substitutions
You can use egg whites or egg substitute in place of the egg for a lower-fat version.
Cooking and Serving Tips
Serve with a side of fresh fruit for a balanced meal.
AMERICAN BBQ TACOS
This is from Vegetarian Times, and begins, “For authentic Southern flavor, top these tacos with prepared coleslaw instead of shredded lettuce.” Yield: Serves 4.
To view this online, click here.
Ingredients:
BBQ Sauce
1 1/2 Tbs. ketchup
1 Tbs. vegetarian Worcestershire sauce
1/2 tsp. honey
1/8 tsp. hot sauce, or more to taste
Tacos
1 1/2 Tbs. vegetable oil
1 cup sliced button mushrooms
1/2 cup diced green bell pepper
1/2 cup shredded carrots
1 cup soy crumbles, such as Lightlife Gimme Lean
4 6-inch corn or flour tortillas, warmed
2 Tbs. chopped red onion
1/3 cup grape tomatoes, halved
1/2 cup shredded Romaine lettuce
1/2 cup shredded cheddar cheese
1 Tbs. pickle relish, optional
Instructions:
To make BBQ Sauce: Combine all ingredients in bowl.
To make Tacos: Heat oil in nonstick skillet over medium heat. Add mushrooms, bell pepper, and carrots, and cook 3 minutes, or until vegetables are softened, stirring halfway through. Add soy crumbles and 2 Tbs. BBQ Sauce. Cook 8 minutes, or until soy crumbles are browned.
Fill tortillas with soy crumble mixture. Top with red onion, tomatoes, lettuce, cheese, and relish, if desired. Serve with BBQ Sauce.
Nutrition Information: Calories: 178; Protein: 12 g; Total Fat: 10 g; Saturated Fat: 3.5 g; Carbohydrates: 10 g; Cholesterol: 15 mg; Sodium: 409 mg; Fiber: 3 g; Sugar: 4 g
POTATO TACOS
Potato Tacos? Sure, why not? After all, after the Ice Cream Tacos, Potato Tacos shouldn't seem that far out, right?
This comes from Vegetarian Times, and begins, "These tasty tacos are spicy! Feel free to reduce the amount of chipotle if you prefer milder flavor." Serves 2.
To view this online, click here.
Ingredients:
1 tsp. vegetable oil
1/2 medium onion, diced
1/2 small red bell pepper, diced
1 small clove garlic, minced
1/2 canned chipotle chili in adobo sauce
1/2 tsp. ground cumin
1 medium potato, baked and diced
1 to 2 tsp. fresh lemon juice
1 Tbs. chopped fresh cilantro
2 whole wheat tortillas, warmed
Instructions:
In large nonstick skillet, heat oil over medium-high heat. Add onion, bell pepper and garlic and cook, stirring often, until almost tender, 3 to 4 minutes.
Add chipotle, cumin and oregano and stir 30 seconds. Add potato, toss well to coat and heat through. Stir in lemon juice and cilantro and remove from heat. Season with salt and freshly ground pepper to taste.
Divide potato mixture among tortillas and serve hot, garnished with condiments as desired.
Nutrition Information: Calories: 226; Protein: 6 g; Total Fat: 3 g; Saturated Fat: 0 g; Carbohydrates: 51 g; Cholesterol: 0 mg; Sodium: 181 mg; Fiber: 6 g; Sugar: 0 g
CHICKPEA TACOS
This comes from the March 2008 issue of Vegetarian Times, page 36. It begins, “Turns out, tacos don’t have to be hot to be delicious. The chickpea-avocado mash used as a filling here is prepared and served at room temperature. (It makes a great sandwich spread as well.) Because the fat content of taco shells can vary, look for brands that contain approximately 6 grams or fewer per shell.” Serves 4 in 30 minutes or less.
To view this online, click here.
1 avocado, peeled, pitted, and diced
1 15-oz. can chickpeas, rinsed and drained
3 Tbs. chopped cilantro
4 tsp. fresh lime juice
1 clove garlic, minced (1 tsp.)
8 corn taco shells
2 cups baby salad greens
1 cup prepared salsa (medium or hot)
1/2 cup nondairy sour cream
Place avocado in small bowl, and mash with fork. Stir in chickpeas, cilantro, lime juice, and garlic; season with salt and pepper.
Set taco shells in napkin-lined basket. Place salad greens, salsa, and sour cream in separate bowls, and set out alongside chickpea-avocado mash.
To serve, let each person build their own taco by filling each shell with 1/4 cup chickpea-avocado mash, some greens, salsa, and sour cream.
nutritional information Per Serving (2 tacos): Calories: 402; Protein: 11 g; Total Fat: 19 g; Saturated Fat: 4 g; Carbohydrates: 51 g; Cholesterol: 0 mg; Sodium: 800 mg; Fiber: 10 g; Sugar: 2 g; Vegan; Gluten-Free
CRISPY VEGETARIAN TACOS
This yummy taco recipe comes from Kraft, and begins, “Make next Monday the most delicious meat-free Monday ever with these Crispy Vegetarian Tacos. Explore the recipe to learn more about these tasty tacos.” Of course, you can also use this for Taco Tuesday!
Prep Time: 25min.; Total Time: 25min.; Servings: 6 servings, 2 tacos each
To view this recipe online, click here.
Ingredients
1 Tbsp. oil
1 Tbsp. KRAFT Zesty Italian Dressing
1/2 cup chopped onions
1-1/2 cups frozen whole kernel corn
1 can (15 oz.) black beans, rinsed
12 TACO BELL® Crunchy Taco Shells, warmed
2 cups shredded iceberg lettuce
1 tomato, seeded, finely chopped
2 green onions, chopped
1 cup KRAFT Mexican Style Shredded Four Cheese with a TOUCH OF PHILADELPHIA
Directions
Heat oil and dressing in large skillet on medium-high heat. Add onions; cook and stir 5 min. or until lightly browned. Add corn; cook 2 min., stirring occasionally. Stir in beans; cook and stir 1 to 2 min. or until mixture is heated through.
Fill taco shells with lettuce, bean mixture and remaining ingredients.
ICE CREAM TACOS
I can hear it now: Ice cream tacos??? Are you crazy?
Well, maybe. But this recipe is definitely something that makes for a perfect dessert – especially on Taco Tuesday.
This is from Leah Maroney, who, besides writing for The Spruce Eats, has her own blog, Mini Pie Kitchen.
For this recipe, Leah wrote, “Move over Choco Tacos, these homemade ice cream tacos are in town. You only need flour tortillas, ice cream, and chocolate chips to make these babies a reality.
“Get a little crazy and make your own ice cream or your own waffle cone shells. Or keep it simple and use the store-bought kinds. You really can't go wrong.
“Ice cream tacos are a fun party treat or spin on popular on-the-go ice creams. Just make sure to serve and eat them quickly!”
Total: 4 hrs 35 mins; Prep: 4 hrs 35 mins;Cook: 0 mins; Yield: 6 ice cream tacos (serves 6)
To view this online, click here.
Ingredients
6 flour tortillas (6-inch)
3 tablespoons butter
1 tablespoon sugar
10 ounces semisweet chocolate chips
6 scoops vanilla ice cream (or other ice cream of your choice)
Garnish: sprinkles
Directions
Preheat the oven to 350 F.
Line a baking sheet with parchment paper. Make 6 foil logs that are large enough so that the tortillas can drape over them to form a taco shell shape. Lay them on the parchment paper and drape the tortillas over each log.
Melt the butter in the microwave. Brush the butter over the top of each tortilla. Then sprinkle each tortilla with the sugar.
Place the baking sheet in the oven and bake for about 10 minutes or until lightly browned.
Remove them from the oven and allow to cool. Then place the baking sheet in the freezer for about 15 minutes or until very cold.
Melt the chocolate chips and coconut oil in the microwave in a microwave safe bowl for 30 second increments, stirring in between until it is completely smooth and melted.
Remove the bowl from the microwave and brush the melted chocolate on the inside of each shell until coated. Place the shells back in the freezer and freeze for another 10 to 15 minutes, or until the chocolate has hardened completely.
While the shells are hardening again, take the ice cream out of the freezer and allow it to soften slightly. Fill each shell with a large scoop of ice cream to the top edge of the shell. Squeeze the shell slightly to disperse the ice cream, being careful not to break the shell.
Place it back onto the baking sheet and freeze again for 1 to 2 hours, until very firm.
Reheat the chocolate in 30 second increments until melted. Pour it into a loaf pan. Dip the top of each taco in the chocolate quickly, covering the ice cream and the top edges of the shell. You need to work quickly so that the ice cream does not mess. Spoon more onto the top of the tacos if needed and then sprinkle generously with sprinkles.
Place them back on the parchment paper and freeze again until the chocolate is completely hardened and then serve!
GLUTEN-FREE EGG AND BLACK BEAN BREAKFAST TACOS
This comes from Kaleigh McMordie, MCN, RDN, LD at VeryWellFit. Kaleigh wrote, “Did you know that corn tortillas are actually considered a whole grain? They are also low in sodium, so they make a great base for healthy breakfast tacos.
“Fried potatoes, meats like bacon and sausage, and cheese can quickly add up when it comes to sodium and saturated fat. These tacos have none of that. Instead, try adding sauteed vegetables, beans, and creamy avocado to your eggs for healthy and flavorful tacos that will have you feeling good all morning long.
“These breakfast tacos are gluten-free and vegetarian, and can be made dairy-free if you leave out the milk or use a milk substitute. If you have other vegetables that need to be used up, feel free to add them in with the onions and jalapeno. Top with your favorite salsa for a flavorful and delicious breakfast.”
Prep Time: 10 minutes; Cook Time: 10 minutes; Total Time: 20 minutes; Servings: 2 (1 taco each).
To view this recipe online, click here.
Ingredients
olive oil spray
2 tablespoons onion, diced
1 tablespoon jalapeno, diced
1/4 cup low sodium black beans
1 large egg
1 tablespoon skim milk
2 corn tortillas
1/4 small avocado, sliced
1 tablespoon cilantro
Directions
Heat a small nonstick skillet over medium heat and spray with oil. Add onions and jalapeno and cook, stirring, until softened, about three minutes. Add black beans and continue cooking until heated through. Remove from skillet and wipe clean.
Turn heat to low and spray skillet with oil again. Whisk together egg and milk. Pour into pan and cook, stirring, until eggs are set.
In a separate pan, heat tortillas over low heat. Divide eggs and bean mixture between the tortillas. Top with avocado and cilantro. Serve.
Ingredient Variations and Substitutions
You can use egg whites or egg substitute in place of the egg for a lower-fat version.
Cooking and Serving Tips
Serve with a side of fresh fruit for a balanced meal.
AMERICAN BBQ TACOS
This is from Vegetarian Times, and begins, “For authentic Southern flavor, top these tacos with prepared coleslaw instead of shredded lettuce.” Yield: Serves 4.
To view this online, click here.
Ingredients:
BBQ Sauce
1 1/2 Tbs. ketchup
1 Tbs. vegetarian Worcestershire sauce
1/2 tsp. honey
1/8 tsp. hot sauce, or more to taste
Tacos
1 1/2 Tbs. vegetable oil
1 cup sliced button mushrooms
1/2 cup diced green bell pepper
1/2 cup shredded carrots
1 cup soy crumbles, such as Lightlife Gimme Lean
4 6-inch corn or flour tortillas, warmed
2 Tbs. chopped red onion
1/3 cup grape tomatoes, halved
1/2 cup shredded Romaine lettuce
1/2 cup shredded cheddar cheese
1 Tbs. pickle relish, optional
Instructions:
To make BBQ Sauce: Combine all ingredients in bowl.
To make Tacos: Heat oil in nonstick skillet over medium heat. Add mushrooms, bell pepper, and carrots, and cook 3 minutes, or until vegetables are softened, stirring halfway through. Add soy crumbles and 2 Tbs. BBQ Sauce. Cook 8 minutes, or until soy crumbles are browned.
Fill tortillas with soy crumble mixture. Top with red onion, tomatoes, lettuce, cheese, and relish, if desired. Serve with BBQ Sauce.
Nutrition Information: Calories: 178; Protein: 12 g; Total Fat: 10 g; Saturated Fat: 3.5 g; Carbohydrates: 10 g; Cholesterol: 15 mg; Sodium: 409 mg; Fiber: 3 g; Sugar: 4 g
POTATO TACOS
Potato Tacos? Sure, why not? After all, after the Ice Cream Tacos, Potato Tacos shouldn't seem that far out, right?
This comes from Vegetarian Times, and begins, "These tasty tacos are spicy! Feel free to reduce the amount of chipotle if you prefer milder flavor." Serves 2.
To view this online, click here.
Ingredients:
1 tsp. vegetable oil
1/2 medium onion, diced
1/2 small red bell pepper, diced
1 small clove garlic, minced
1/2 canned chipotle chili in adobo sauce
1/2 tsp. ground cumin
1 medium potato, baked and diced
1 to 2 tsp. fresh lemon juice
1 Tbs. chopped fresh cilantro
2 whole wheat tortillas, warmed
Instructions:
In large nonstick skillet, heat oil over medium-high heat. Add onion, bell pepper and garlic and cook, stirring often, until almost tender, 3 to 4 minutes.
Add chipotle, cumin and oregano and stir 30 seconds. Add potato, toss well to coat and heat through. Stir in lemon juice and cilantro and remove from heat. Season with salt and freshly ground pepper to taste.
Divide potato mixture among tortillas and serve hot, garnished with condiments as desired.
Nutrition Information: Calories: 226; Protein: 6 g; Total Fat: 3 g; Saturated Fat: 0 g; Carbohydrates: 51 g; Cholesterol: 0 mg; Sodium: 181 mg; Fiber: 6 g; Sugar: 0 g
CHICKPEA TACOS
This comes from the March 2008 issue of Vegetarian Times, page 36. It begins, “Turns out, tacos don’t have to be hot to be delicious. The chickpea-avocado mash used as a filling here is prepared and served at room temperature. (It makes a great sandwich spread as well.) Because the fat content of taco shells can vary, look for brands that contain approximately 6 grams or fewer per shell.” Serves 4 in 30 minutes or less.
To view this online, click here.
1 avocado, peeled, pitted, and diced
1 15-oz. can chickpeas, rinsed and drained
3 Tbs. chopped cilantro
4 tsp. fresh lime juice
1 clove garlic, minced (1 tsp.)
8 corn taco shells
2 cups baby salad greens
1 cup prepared salsa (medium or hot)
1/2 cup nondairy sour cream
Place avocado in small bowl, and mash with fork. Stir in chickpeas, cilantro, lime juice, and garlic; season with salt and pepper.
Set taco shells in napkin-lined basket. Place salad greens, salsa, and sour cream in separate bowls, and set out alongside chickpea-avocado mash.
To serve, let each person build their own taco by filling each shell with 1/4 cup chickpea-avocado mash, some greens, salsa, and sour cream.
nutritional information Per Serving (2 tacos): Calories: 402; Protein: 11 g; Total Fat: 19 g; Saturated Fat: 4 g; Carbohydrates: 51 g; Cholesterol: 0 mg; Sodium: 800 mg; Fiber: 10 g; Sugar: 2 g; Vegan; Gluten-Free
Monday, July 22, 2019
Monday Recipes
Ever notice how weekends seem to fly by? If you're like me, you probably didn't get everything done you planned to over the weekend.
Well, since we need to eat (no matter how busy we are), here are six recipes to help you start off the week, including Vegan Chinese Kung Pao Tofu and Home-Style Gingerbread. Enjoy!
VEGAN FRIED “CHICKEN” WITH SEITAN
This is from Jolinda Hackett, who wrote for The Spruce Eats. Jolinda wrote, “Vegan fried ‘chicken’ made with seitan. This fried seitan "chicken" dish is deep-fried, so it isn't particularly healthy, though it is cholesterol-free and it sure is mighty tasty! Deep fried seitan and a blend of spices create a dish that's really quite similar in appearance and taste to fried chicken. If you like southern fried chicken, try vegan southern fried seitan made with all the same ingredients including a spicy batter and a coat of flour to make it just the perfect amount of crispiness. Make sure you have some ketchup or mustard or something to serve alongside to dip your vegan fried chicken in.”
Prep Time: 10 minutes; Cook Time: 15 minutes; Total Time: 25 minutes; Yield: 4 servings.
You can view this online here.
Ingredients
1 teaspoon salt (or seasoned salt)
1 teaspoon onion powder
1 teaspoon garlic powder
1 teaspoon black pepper
Optional: dash cayenne pepper
1 1/2 cups flour
Optional: 1/4 cup nutritional yeast
1/4 cup mustard
2 tablespoons baking powder
1/2 cup water
1 lb. seitan (or another chicken substitute, cut into 1 to 2" square pieces)
Directions
In a medium to large bowl, mix together the salt, onion powder, garlic powder, flour, black pepper, cayenne, and nutritional yeast.
In a separate small bowl, whisk together the mustard and water. Add 1/3 cup of the flour mixture to the mustard mixture and combine well.
Add baking powder to the flour mixture and combine well.
Coat pieces of seitan or mock chicken with the mustard batter, then coat each piece with the dry flour mixture.
Fry chunks of "chicken" in the oil on medium-high heat in a large skillet for 3 to 5 minutes, turning once until golden brown. Drain on a paper towel, serve with ketchup, ranch dressing, honey mustard, hot sauce or barbecue sauce.
VEGAN CHINESE KUNG PAO TOFU
This is also from Jolinda Hackett, of The Spruce Eats. Jolinda wrote, “Never had kung pao tofu before? Looking for something new to try for a vegetarian dinner tonight? Try this vegetarian Chinese dish!
“Although this traditional Chinese food dish is usually made with chicken, you can use tofu to create a very similar vegetarian and vegan version of traditional kung pao chicken using all the same Chinese ingredients and seasonings, including sesame oil, red pepper flakes, onion, lime and hot sauce. This vegetarian kung pao tofu recipe also calls for lots of healthy Chinese veggies including snow peas, bok choy, cabbage, and mushrooms.
“Serve this Szechuan-style Chinese kung pao tofu recipe over rice.
“Need this recipe to be gluten-free as well as vegan? Double-check that your is gluten-free, and use tamari in place of the soy sauce.”
Prep Time: 45 minutes; Cook Time: 15 minutes; Total Time: 60 minutes; Yield: about 3 servings.
View this online here.
Ingredients
3 tbsp vegetable broth
1 tbsp lime juice
2 tbsp soy sauce (or tamari to keep it gluten-free)
1 pound firm or extra firm tofu, cut into bite-sized cubes
1 tbsp sesame oil + 2 tbsp
1 onion, diced
1 red bell pepper, diced
1/4 tsp red pepper flakes
1/2 cup sliced mushrooms
1 tbsp fresh ginger, minced
1 small bok choy, chopped
1/4 cup vegetable broth
1/2 cup snow peas
1/2 small purple cabbage, sliced thin
1 tbsp fresh chopped parsley
1 tsp hot sauce
Salt and pepper to taste
Directions
Prepare your tofu. Like most vegetarian tofu recipes, this tofu recipe will taste best if you press the tofu first. This allows the tofu to absorb more of the flavorings and seasonings which you add to it.
Once your tofu is ready, combine the 3 tbsp vegetable broth, lime juice, soy sauce, 1 tbsp sesame oil and the tofu in a small bowl. Allow to marinate for at least 30 minutes, mixing occasionally to coat the tofu well.
Pre-heat oven to 375 F. Grease a baking sheet or cover with foil and bake tofu for 15 minutes, turning once.
In a large skillet or wok over medium-high heat, saute the onion, bell pepper, red pepper flakes, mushrooms and ginger in 2 tbsp sesame oil for 3 to 5 minutes, stirring frequently. Add bok choy and vegetable broth and cook for 3 to 5 more minutes. Add cabbage and snow peas.
Reduce heat to low and add tofu and remaining ingredients, cooking just until combined and heated through. Serve over rice.
VEGETARIAN MAPO TOFU
This is from David Tanis in The New York Times cooking e-newsletterr. David wrote, “Mapo tofu is a justly popular menu item in many Chinese restaurants. It is a quickly cooked dish of braised tofu with minced pork (sometimes beef) in a bracing spicy sauce made with fermented black beans and fermented broad bean paste, along with hot red pepper and Sichuan pepper. This meatless version with fresh shiitake mushrooms is completely satisfying, and surprisingly easy to make. For the best texture, use soft tofu rather than firm, taking care to cook it gently to keep it from crumbling.”
Yield: 4 to 6 servings; Time: 30 minutes
This was featured in “Mapo Tofu Goes Vegetarian”, and can be viewed online at https://cooking.nytimes.com/recipes/1017358-vegetarian-mapo-tofu.
Ingredients
8 ounces shiitake mushrooms
2 cups water
15 ounce block of soft tofu (do not use silken)
Salt
3 tablespoons vegetable oil
3 small dried hot red peppers
1 tablespoon fermented black beans, rinsed
1 tablespoon fermented spicy broad bean paste (doubanjiang)
2 teaspoons minced garlic
1 tablespoon grated ginger
2 teaspoons soy sauce
1 teaspoon toasted sesame oil
1 teaspoon finely ground Sichuan pepper
1 tablespoon corn- or potato starch, dissolved in 3 tablespoons cold water
1/2 cup slivered scallions, both white and green parts
Cilantro sprigs, for garnish
Directions
Remove stems from mushrooms. Make a light mushroom broth by simmering stems in 2 cups water for 15 minutes, then strain and reserve broth (discard stems). Dice mushroom caps and set aside.
Cut tofu into 1-inch cubes. Cover with boiling salted water, let steep for 15 minutes, then drain.
Put oil in a wok or wide skillet over medium heat. Add red peppers, black beans and bean paste and cook, stirring until fragrant, about 1 minute. Add garlic and ginger and let sizzle, then add mushrooms, soy sauce, sesame oil and Sichuan pepper. Add 1 1/2 cups mushroom broth and cook mixture gently for 2 minutes.
Carefully add tofu cubes. Shake pan to distribute sauce, using a wooden spoon to help. Try to avoid smashing tofu. Drizzle in cornstarch mixture, gently swirling pan to incorporate (sauce will thicken) and simmer tofu in sauce for 2 minutes more. Thin with a little mushroom broth if necessary.
COUSCOUS WITH MIXED VEGETABLES
This came from the infamous long-since-forgotten emailing list.
Ingredients
Couscous:
16 oz couscous
2 cups water
2 teaspoons oil or margarine
Salt & pepper
Aromatic broth:
1 onion, chopped
1/2 cup golden raisins
2 Tablespoons turmeric
1 Tablespoon sugar
1 Tablespoon coriander, ground
1 Tablespoon cumin
1 cinnamon stick
1 cup water
Salt & pepper to taste
Vegetables:
1/2 zucchini
1/2 yellow squash
1 turnip
1 carrot
1/8 cabbage
Directions
Boil water with salt, pepper & oil. Mix in couscous & place plastic wrap on top. Let steam for 15 minutes. Sauté onion. Add raisins, turmeric, coriander, cumin & cinnamon stick & 6 cups of water. Boil for 25 minutes, then strain. Cook zucchini, yellow squash, turnip, carrot, & cabbage in broth & set aside until ready to use.
HOME-STYLE GINGERBREAD
This was originally from about.com, which has changed to dotdash.com. I've checked around, and can't locate this recipe on any of their channels; if anyone happens to find it there, please let me know!
This recipe began, “This wonderful ginger and cinnamon-scented cake is sure to bring a smile to your face, and it's the perfect dessert for a cold winter weekend. Top this warm gingerbread with a generous dollop of fresh sweetened whipped cream and sprinkle with a little cinnamon.”
Ingredients
2 1/3 cups all-purpose flour
1/3 cup granulated sugar
1 cup molasses
3/4 cup hot water
1/2 cup butter, room temperature
1 large egg
1/2 teaspoon salt
1 teaspoon baking soda
1 teaspoon ground ginger
1 teaspoon ground cinnamon
Directions
Grease & flour 9-inch square baking pan or spray with baking spray with flour. Heat oven to 325°. Combine all ingredients in mixing bowl; beat on low speed of electric mixer until ingredients are combined. Scrape sides of the bowl & increase mixer speed to medium; beat for about 3 minutes longer. Pour the batter into the prepared baking pan.
Bake for 45 to 55 minutes, or until a cake tester or toothpick inserted into the center of the cake comes out clean.
Cut into squares and serve with freshly whipped cream. To serve leftover gingerbread, warm slightly in the microwave for about 15 to 20 seconds.
This gingerbread freezes well: cut into squares and wrap individually. Thaw & warm in the microwave just before serving.
DUMP CAKE
This is also from the infamous long-since-forgotten emailing list. I ran across many good recipes that way. I really wish I had a link (and/or a name) to tag this with. But then, don't most of us have recipes that we've run across and use regularly that have their birth in the foggy past?
Ingredients
1 (21 oz) can cherry pie filling
1 (15 oz) can crushed pineapple
1 (18 oz) pkg. yellow cake mix
8 oz. chopped walnuts
1/2 C. butter (melted)
Directions
In a 9x13 pan mix cherry pie filling and pineapple. Sprinkle dry cake mix over pineapple and cherry mixture, stir until just combined. Then sprinkle walnuts over top. Drizzle top with melted butter. Bake at 350 for 35-40 minutes or until golden brown.
Well, since we need to eat (no matter how busy we are), here are six recipes to help you start off the week, including Vegan Chinese Kung Pao Tofu and Home-Style Gingerbread. Enjoy!
VEGAN FRIED “CHICKEN” WITH SEITAN
This is from Jolinda Hackett, who wrote for The Spruce Eats. Jolinda wrote, “Vegan fried ‘chicken’ made with seitan. This fried seitan "chicken" dish is deep-fried, so it isn't particularly healthy, though it is cholesterol-free and it sure is mighty tasty! Deep fried seitan and a blend of spices create a dish that's really quite similar in appearance and taste to fried chicken. If you like southern fried chicken, try vegan southern fried seitan made with all the same ingredients including a spicy batter and a coat of flour to make it just the perfect amount of crispiness. Make sure you have some ketchup or mustard or something to serve alongside to dip your vegan fried chicken in.”
Prep Time: 10 minutes; Cook Time: 15 minutes; Total Time: 25 minutes; Yield: 4 servings.
You can view this online here.
Ingredients
1 teaspoon salt (or seasoned salt)
1 teaspoon onion powder
1 teaspoon garlic powder
1 teaspoon black pepper
Optional: dash cayenne pepper
1 1/2 cups flour
Optional: 1/4 cup nutritional yeast
1/4 cup mustard
2 tablespoons baking powder
1/2 cup water
1 lb. seitan (or another chicken substitute, cut into 1 to 2" square pieces)
Directions
In a medium to large bowl, mix together the salt, onion powder, garlic powder, flour, black pepper, cayenne, and nutritional yeast.
In a separate small bowl, whisk together the mustard and water. Add 1/3 cup of the flour mixture to the mustard mixture and combine well.
Add baking powder to the flour mixture and combine well.
Coat pieces of seitan or mock chicken with the mustard batter, then coat each piece with the dry flour mixture.
Fry chunks of "chicken" in the oil on medium-high heat in a large skillet for 3 to 5 minutes, turning once until golden brown. Drain on a paper towel, serve with ketchup, ranch dressing, honey mustard, hot sauce or barbecue sauce.
VEGAN CHINESE KUNG PAO TOFU
This is also from Jolinda Hackett, of The Spruce Eats. Jolinda wrote, “Never had kung pao tofu before? Looking for something new to try for a vegetarian dinner tonight? Try this vegetarian Chinese dish!
“Although this traditional Chinese food dish is usually made with chicken, you can use tofu to create a very similar vegetarian and vegan version of traditional kung pao chicken using all the same Chinese ingredients and seasonings, including sesame oil, red pepper flakes, onion, lime and hot sauce. This vegetarian kung pao tofu recipe also calls for lots of healthy Chinese veggies including snow peas, bok choy, cabbage, and mushrooms.
“Serve this Szechuan-style Chinese kung pao tofu recipe over rice.
“Need this recipe to be gluten-free as well as vegan? Double-check that your is gluten-free, and use tamari in place of the soy sauce.”
Prep Time: 45 minutes; Cook Time: 15 minutes; Total Time: 60 minutes; Yield: about 3 servings.
View this online here.
Ingredients
3 tbsp vegetable broth
1 tbsp lime juice
2 tbsp soy sauce (or tamari to keep it gluten-free)
1 pound firm or extra firm tofu, cut into bite-sized cubes
1 tbsp sesame oil + 2 tbsp
1 onion, diced
1 red bell pepper, diced
1/4 tsp red pepper flakes
1/2 cup sliced mushrooms
1 tbsp fresh ginger, minced
1 small bok choy, chopped
1/4 cup vegetable broth
1/2 cup snow peas
1/2 small purple cabbage, sliced thin
1 tbsp fresh chopped parsley
1 tsp hot sauce
Salt and pepper to taste
Directions
Prepare your tofu. Like most vegetarian tofu recipes, this tofu recipe will taste best if you press the tofu first. This allows the tofu to absorb more of the flavorings and seasonings which you add to it.
Once your tofu is ready, combine the 3 tbsp vegetable broth, lime juice, soy sauce, 1 tbsp sesame oil and the tofu in a small bowl. Allow to marinate for at least 30 minutes, mixing occasionally to coat the tofu well.
Pre-heat oven to 375 F. Grease a baking sheet or cover with foil and bake tofu for 15 minutes, turning once.
In a large skillet or wok over medium-high heat, saute the onion, bell pepper, red pepper flakes, mushrooms and ginger in 2 tbsp sesame oil for 3 to 5 minutes, stirring frequently. Add bok choy and vegetable broth and cook for 3 to 5 more minutes. Add cabbage and snow peas.
Reduce heat to low and add tofu and remaining ingredients, cooking just until combined and heated through. Serve over rice.
VEGETARIAN MAPO TOFU
This is from David Tanis in The New York Times cooking e-newsletterr. David wrote, “Mapo tofu is a justly popular menu item in many Chinese restaurants. It is a quickly cooked dish of braised tofu with minced pork (sometimes beef) in a bracing spicy sauce made with fermented black beans and fermented broad bean paste, along with hot red pepper and Sichuan pepper. This meatless version with fresh shiitake mushrooms is completely satisfying, and surprisingly easy to make. For the best texture, use soft tofu rather than firm, taking care to cook it gently to keep it from crumbling.”
Yield: 4 to 6 servings; Time: 30 minutes
This was featured in “Mapo Tofu Goes Vegetarian”, and can be viewed online at https://cooking.nytimes.com/recipes/1017358-vegetarian-mapo-tofu.
Ingredients
8 ounces shiitake mushrooms
2 cups water
15 ounce block of soft tofu (do not use silken)
Salt
3 tablespoons vegetable oil
3 small dried hot red peppers
1 tablespoon fermented black beans, rinsed
1 tablespoon fermented spicy broad bean paste (doubanjiang)
2 teaspoons minced garlic
1 tablespoon grated ginger
2 teaspoons soy sauce
1 teaspoon toasted sesame oil
1 teaspoon finely ground Sichuan pepper
1 tablespoon corn- or potato starch, dissolved in 3 tablespoons cold water
1/2 cup slivered scallions, both white and green parts
Cilantro sprigs, for garnish
Directions
Remove stems from mushrooms. Make a light mushroom broth by simmering stems in 2 cups water for 15 minutes, then strain and reserve broth (discard stems). Dice mushroom caps and set aside.
Cut tofu into 1-inch cubes. Cover with boiling salted water, let steep for 15 minutes, then drain.
Put oil in a wok or wide skillet over medium heat. Add red peppers, black beans and bean paste and cook, stirring until fragrant, about 1 minute. Add garlic and ginger and let sizzle, then add mushrooms, soy sauce, sesame oil and Sichuan pepper. Add 1 1/2 cups mushroom broth and cook mixture gently for 2 minutes.
Carefully add tofu cubes. Shake pan to distribute sauce, using a wooden spoon to help. Try to avoid smashing tofu. Drizzle in cornstarch mixture, gently swirling pan to incorporate (sauce will thicken) and simmer tofu in sauce for 2 minutes more. Thin with a little mushroom broth if necessary.
COUSCOUS WITH MIXED VEGETABLES
This came from the infamous long-since-forgotten emailing list.
Ingredients
Couscous:
16 oz couscous
2 cups water
2 teaspoons oil or margarine
Salt & pepper
Aromatic broth:
1 onion, chopped
1/2 cup golden raisins
2 Tablespoons turmeric
1 Tablespoon sugar
1 Tablespoon coriander, ground
1 Tablespoon cumin
1 cinnamon stick
1 cup water
Salt & pepper to taste
Vegetables:
1/2 zucchini
1/2 yellow squash
1 turnip
1 carrot
1/8 cabbage
Directions
Boil water with salt, pepper & oil. Mix in couscous & place plastic wrap on top. Let steam for 15 minutes. Sauté onion. Add raisins, turmeric, coriander, cumin & cinnamon stick & 6 cups of water. Boil for 25 minutes, then strain. Cook zucchini, yellow squash, turnip, carrot, & cabbage in broth & set aside until ready to use.
HOME-STYLE GINGERBREAD
This was originally from about.com, which has changed to dotdash.com. I've checked around, and can't locate this recipe on any of their channels; if anyone happens to find it there, please let me know!
This recipe began, “This wonderful ginger and cinnamon-scented cake is sure to bring a smile to your face, and it's the perfect dessert for a cold winter weekend. Top this warm gingerbread with a generous dollop of fresh sweetened whipped cream and sprinkle with a little cinnamon.”
Ingredients
2 1/3 cups all-purpose flour
1/3 cup granulated sugar
1 cup molasses
3/4 cup hot water
1/2 cup butter, room temperature
1 large egg
1/2 teaspoon salt
1 teaspoon baking soda
1 teaspoon ground ginger
1 teaspoon ground cinnamon
Directions
Grease & flour 9-inch square baking pan or spray with baking spray with flour. Heat oven to 325°. Combine all ingredients in mixing bowl; beat on low speed of electric mixer until ingredients are combined. Scrape sides of the bowl & increase mixer speed to medium; beat for about 3 minutes longer. Pour the batter into the prepared baking pan.
Bake for 45 to 55 minutes, or until a cake tester or toothpick inserted into the center of the cake comes out clean.
Cut into squares and serve with freshly whipped cream. To serve leftover gingerbread, warm slightly in the microwave for about 15 to 20 seconds.
This gingerbread freezes well: cut into squares and wrap individually. Thaw & warm in the microwave just before serving.
DUMP CAKE
This is also from the infamous long-since-forgotten emailing list. I ran across many good recipes that way. I really wish I had a link (and/or a name) to tag this with. But then, don't most of us have recipes that we've run across and use regularly that have their birth in the foggy past?
Ingredients
1 (21 oz) can cherry pie filling
1 (15 oz) can crushed pineapple
1 (18 oz) pkg. yellow cake mix
8 oz. chopped walnuts
1/2 C. butter (melted)
Directions
In a 9x13 pan mix cherry pie filling and pineapple. Sprinkle dry cake mix over pineapple and cherry mixture, stir until just combined. Then sprinkle walnuts over top. Drizzle top with melted butter. Bake at 350 for 35-40 minutes or until golden brown.
Friday, July 19, 2019
Friday Recipes
It's finally Friday. Here are six yummy recipes to help you through the weekend, including Easy Breaded Tofu Nuggets and Meatless-Ball Subs. Enjoy!
SUMMER MINISTRONE SOUP
This comes from tbsp.com, and begins, “Minestrone soup, swimming with beans and macaroni, is vegetable soup’s heartier Italian cousin. Preparing it in advance and having at the ready in your freezer will have you singing ‘That’s Amore’ when dinnertime comes around.”
Prep Time: 40 minutes; Total Time: 40 minutes; Servings: 4
To view this online, click here.
Ingredients
1 tablespoon olive oil
1/2 cup finely chopped onion
1/4 teaspoon salt
2 cloves garlic, finely chopped
1/2 teaspoon dried thyme leaves
1/2 teaspoon dried oregano leaves
1 can (14.5 oz) Muir Glen™ organic diced tomatoes, undrained
1 cup Progresso™ cannellini beans, drained, rinsed (from 15-oz can)
1 medium zucchini, cut into 1/2-inch cubes
1 medium carrot, thinly sliced
1/2 cup fresh or frozen cut (1/2-inch) green beans
1/2 cup uncooked elbow macaroni
1 carton (32 oz) Progresso™ broth vegetable
Shredded Parmesan cheese, if desired
Directions
In 4-quart saucepan, heat oil over medium heat. Add the onion and salt; cook until softened, about 4 minutes. Add garlic, thyme and oregano; cook 2 minutes. Stir in tomatoes, cannellini beans, zucchini, carrot, green beans and macaroni.
Add stock; heat to simmering over medium-high heat. Cook 6 to 8 minutes or until macaroni is al dente. Top with Parmesan cheese.
To freeze: In 8-inch skillet, heat oil over medium heat. Add onion and salt; cook about 4 minutes or until softened. Add garlic, thyme and oregano; cook 2 minutes. Transfer to medium bowl. Stir in tomatoes and cannellini beans. Transfer to 1-quart resealable freezer plastic bag. Mix zucchini, carrot, green beans and macaroni in another 1-quart resealable freezer plastic bag. Freeze both bags up to 3 months. When ready to serve: In 4-quart saucepan, mix broth and bag of frozen tomato-bean mixture; heat to simmering over medium-high heat. Reduce heat to medium; cook until frozen tomato-bean mixture is completely thawed, stirring occasionally. Add bag of vegetables and macaroni; return to simmering. Cook 6 to 8 minutes or until macaroni is al dente. Top with Parmesan cheese.
Expert Tips
Lots of fun small pasta shapes are on your grocery store shelves. Try ditalini, orzo or small shells for a change of pace from elbow macaroni.
Canned chickpeas are a good substitute for the cannellini beans in this soup.
MEATLESS-BALL SUBS
1 package Meatless Balls (see note)
1 26 oz. Jar spaghetti sauce
4 hoagie rolls
cheese slices
Place spaghetti sauce and meatless balls into a good-sized saucepan. Stir, and cook over medium-low to medium heat, stirring occasionally.
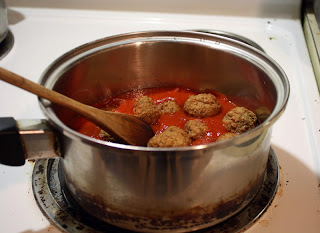

Open hoagie rolls, add cheese, cover with meatless balls and sauce.

Makes 4 meatless ball subs.
Note: I use Veggie Patch Meatless Meatballs, though really, you can use any brand you like. I had used another brand for a number of years, but unfortunately, I can no longer find that particular brand anywhere now. Whatever brand you buy is fine, as well as the jarred spaghetti sauce.
SUGAR SNAP PEAS AND CARROTS
Recipe Yield: Makes 4 servings.
Source: AICR
Recipe and image appear courtesy of American Institute for Cancer Research.
View this online at https://diabeticgourmet.com/diabetic-recipes/sugar-snap-peas-and-carrots.
Ingredients
1 tsp. canola oil
1 small garlic clove, minced
1 tsp. grated or minced ginger
8 oz. sugar snap peas
3 baby carrots, cut lengthwise in 8 strips
3 Tbsp. vegetable broth, or water
Salt and freshly ground black pepper, to taste
2 large basil leaves, cut crosswise in thin strips
Directions
Heat oil in a medium non-stick skillet over medium-high heat. Saute garlic and ginger until fragrant, about 30 seconds. Add peas and carrots to the pan, stirring to coat them with oil. Add broth or water. Cook, stirring occasionally, until peas are tender-crisp, about 4 minutes. Season to taste with salt and pepper. Mix in basil and serve.
Notes:
Additional Info: 2 g. dietary fiber
Nutritional Information Per Serving: Calories: 47; Fat: 1 g; Sodium: 109 mg; Protein: 2 g; Carbohydrates: 7 g
Diabetic Exchanges: 1-1/2 Vegetable
EASY BREADED TOFU NUGGETS
This is from Jolinda Hackett, who wrote for The Spruce Eats. For this recipe, Jolinda wrote, “Fool your kids with a meat-free tofu chicken nugget dinner, reminiscent of the favorite finger food they love to dip in ketchup, barbecue sauce, or ranch dressing.
“In this recipe, extra-firm tofu is coated with a seasoned panko breadcrumb mixture. Then, just like chicken, it's baked or fried to a crispy, addicting perfection.
“If you're squeamish about cooking with tofu, try this nugget recipe before you shun it, as the flavors mimic the taste of real chicken. Just make sure to follow the directions carefully, taking care to press the tofu before cooking for better consistency and taste. Then, decide on a cooking medium—for all-out flavor, go fried or for a low-fat preparation, go baked. Whatever way you choose, tofu (not) chicken nuggets make a perfect snack or dinner for picky kids and vegan eaters alike.
“Like most tofu recipes, this one will taste best if you press the tofu first. This allows the tofu to expel additional moisture so that it can absorb the seasonings for better flavor. It also helps the tofu retain its shape during the cooking process.”
Total: 70 mins; Prep: 45 mins; Cook: 25 mins; Yield: 4 servings
To view this online, click here.
Ingredients
1 block tofu (firm or extra-firm, well pressed)
1/3 cup soy milk (or another non-dairy milk substitute)
2 tablespoons mustard
1 tablespoon nutritional yeast
1 teaspoon onion powder
1 teaspoon garlic powder
1 teaspoon dried parsley (or Italian seasoning)
1/2 teaspoon sea salt
1/4 teaspoon black pepper
1/2 cup panko breadcrumbs
3 tablespoons high-heat vegetable oil (or coconut oil)
Directions
Note: while there are multiple steps to this recipe, these vegan nuggets are broken down into workable categories to help you better plan for preparation and baking.
Press the Tofu
Gather the ingredients.
Remove the tofu from its package.
Pat the block of tofu dry and place it in between two layers of paper towels.
Place a small cutting board (or flat-surfaced item) and a weight— like a pot or a brick—on top of the tofu.
Let the tofu sit for 30 minutes, replacing the paper towels when they become saturated.
Prep the Tofu
Once your tofu is pressed, slice it into 1-inch cubes or nuggets (about the size of a frozen chicken nugget).
In a wide, shallow bowl, whisk together the soy milk, mustard, nutritional yeast, and spices until smooth.
Place the panko breadcrumbs in a separate bowl.
Pan-Fry the Tofu
Heat the oil in a frying pan on medium-high heat.
Take one piece of tofu and dip it in the liquid mixture. Then carefully dip it in the breadcrumbs until well coated.
Add it to the pan and repeat the process.
Fry the pieces of tofu, turning them often, until golden brown on all sides.
Serve and enjoy!
Bake the Tofu
For a low-fat alternative cooking method, bake your tofu nuggets on a prepared baking sheet.
Preheat your oven to 350 F and then bake the tofu for 25 minutes, turning once, until golden brown.
Serve your vegetarian tofu nuggets with ketchup, barbecue sauce, or Sriracha hot sauce and enjoy.
BANANA SNACKING CAKE WITH SALTED CARAMEL GLAZE
This is from Melissa Clark in The New York Times cooking e-newsletter. Melissa wrote, “This buttery snacking cake is a bit like banana bread, but richer, and topped with a sticky caramel frosting that is dotted with crunchy flakes of sea salt. The frosting, made from brown sugar and heavy cream, is easier than a classic caramel, but just as compelling, with the sea salt contrasting perfectly with its sweetness. It’s important to use ripe bananas here. Soft, spotty ones with dark yellow skins will be the sweetest and most complex. Firm, pale yellow bananas just don’t have enough intensity to flavor the cake.”
For the Glaze:
Yield: 12 servings; Time: 1 hour, plus cooling
This was featured in “Three Snacking Cakes to Change Your Afternoons”, and can be viewed online here.
Ingredients
For the Cake:
1/2 cup unsalted butter (1 stick), melted, plus more for pan
1 1/2 cups all-purpose flour
1/4 cup granulated sugar
3/4 teaspoon baking soda
1/2 teaspoon fine salt
1 cup mashed banana (from 2 to 3 very ripe bananas)
1/4 cup sour cream
2 tablespoons dark brown sugar
2 large eggs
1 teaspoon vanilla extract
For the Glaze:
4 tablespoons unsalted butter (1/2 stick), cut into pieces
1/3 packed cup dark brown sugar
1/4 cup heavy cream
Large pinch of fine sea salt
1/4 cup confectioners’ sugar
Flaky sea salt, for serving
Preparation
Heat oven to 350 degrees. Grease a 9-by-9-inch pan, and then line with parchment paper, letting the two long ends hang over the edges by at least 2 inches.
In a large bowl, whisk together flour, granulated sugar, baking soda and salt. Whisk in bananas, melted butter, sour cream, brown sugar, eggs and vanilla.
Scrape into baking pan and smooth the top. Bake until the top springs back when lightly pressed in the center, and a toothpick inserted in the center comes out clean, about 25 minutes. Let cool completely.
When cake is cool, make the glaze: In a medium or large pot (not a small one because the mixture will bubble up), combine butter, brown sugar, heavy cream and salt. Bring to a full boil and continue to boil over medium heat for 1 minute. Remove from heat and let sit for 5 minutes.
Whisk in confectioners’ sugar until smooth, then immediately pour over cooled cake. Spread evenly across cake and let set for at least 30 minutes. Sprinkle with flaky sea salt before serving.
CAST-IRON APPLE AND BLACKBERRY CRUMBLE
This is from Matt Abdoo and was posted on the TODAY Show’s site. Matt wrote, “My dad used to make this for me growing up! Apples from upstate New York are some of the best in the country. They always added the perfect amount of tartness and sweetness to this crispy crumble.
“Technique tip: Use your favorite apples for a signature taste and to make it your own.
“Swap option: Pears work great and so do peaches! You can also use a 10- by 15-inch baking dish if not using the grill.”
Prep Time: 15 minutes; Cook Time: 40 minutes; Servings: 12
To view this online, go to https://www.today.com/recipes/cast-iron-apple-blackberry-crumble-recipe-t154818.
Ingredients
Crumble Topping
1 cup all-purpose flour
3 packs (1 cup) apple-cinnamon instant oatmeal
1 cup light brown sugar
3/4 cup chopped pecans
1 teaspoon baking powder
1/2 teaspoon kosher salt
8 ounces (2 sticks) cold unsalted butter, grated
Apple Filling
2 pounds honey crisp apples, peeled, cored, and sliced 1/4-inch thick
1 pound granny smith apples, peeled, cored, and sliced 1/4-inch thick
1 pint blackberries
6 tablespoons unsalted butter, melted
1/4 cup all-purpose flour
1 tablespoon cornstarch
2 tablespoon lemon juice
1 teaspoon cinnamon
1 teaspoon ginger
1/2 teaspoon allspice
1/2 cup light brown sugar
1/2 teaspoon kosher salt
Preparation
Pre-heat oven or grill to 350°F.
For the crumble topping:
In a medium sized mixing bowl combine flour, apple-cinnamon instant oatmeal, chopped pecans, light brown sugar, baking powder, salt and cold grated butter until it forms a coarse crumble.
For the apple filling:
In another large mixing bowl combine the apples with melted butter, flour, corn starch, lemon juice, light brown sugar, salt and spices and toss to fully coat the apples. Next fold in the blackberries and pour the apple mixture into a 12-inch cast iron pan.
To assemble:
Fully coat the top of the apple mixture with the crumble topping and bake for 30-40 minutes or until the crumble topping is golden brown and the apples are tender.
Allow the crumble to cool slightly, and then serve warm with vanilla ice cream or whipped cream. Or chill overnight and serve cold.
SUMMER MINISTRONE SOUP
This comes from tbsp.com, and begins, “Minestrone soup, swimming with beans and macaroni, is vegetable soup’s heartier Italian cousin. Preparing it in advance and having at the ready in your freezer will have you singing ‘That’s Amore’ when dinnertime comes around.”
Prep Time: 40 minutes; Total Time: 40 minutes; Servings: 4
To view this online, click here.
Ingredients
1 tablespoon olive oil
1/2 cup finely chopped onion
1/4 teaspoon salt
2 cloves garlic, finely chopped
1/2 teaspoon dried thyme leaves
1/2 teaspoon dried oregano leaves
1 can (14.5 oz) Muir Glen™ organic diced tomatoes, undrained
1 cup Progresso™ cannellini beans, drained, rinsed (from 15-oz can)
1 medium zucchini, cut into 1/2-inch cubes
1 medium carrot, thinly sliced
1/2 cup fresh or frozen cut (1/2-inch) green beans
1/2 cup uncooked elbow macaroni
1 carton (32 oz) Progresso™ broth vegetable
Shredded Parmesan cheese, if desired
Directions
In 4-quart saucepan, heat oil over medium heat. Add the onion and salt; cook until softened, about 4 minutes. Add garlic, thyme and oregano; cook 2 minutes. Stir in tomatoes, cannellini beans, zucchini, carrot, green beans and macaroni.
Add stock; heat to simmering over medium-high heat. Cook 6 to 8 minutes or until macaroni is al dente. Top with Parmesan cheese.
To freeze: In 8-inch skillet, heat oil over medium heat. Add onion and salt; cook about 4 minutes or until softened. Add garlic, thyme and oregano; cook 2 minutes. Transfer to medium bowl. Stir in tomatoes and cannellini beans. Transfer to 1-quart resealable freezer plastic bag. Mix zucchini, carrot, green beans and macaroni in another 1-quart resealable freezer plastic bag. Freeze both bags up to 3 months. When ready to serve: In 4-quart saucepan, mix broth and bag of frozen tomato-bean mixture; heat to simmering over medium-high heat. Reduce heat to medium; cook until frozen tomato-bean mixture is completely thawed, stirring occasionally. Add bag of vegetables and macaroni; return to simmering. Cook 6 to 8 minutes or until macaroni is al dente. Top with Parmesan cheese.
Expert Tips
Lots of fun small pasta shapes are on your grocery store shelves. Try ditalini, orzo or small shells for a change of pace from elbow macaroni.
Canned chickpeas are a good substitute for the cannellini beans in this soup.
MEATLESS-BALL SUBS
1 package Meatless Balls (see note)
1 26 oz. Jar spaghetti sauce
4 hoagie rolls
cheese slices
Place spaghetti sauce and meatless balls into a good-sized saucepan. Stir, and cook over medium-low to medium heat, stirring occasionally.


Open hoagie rolls, add cheese, cover with meatless balls and sauce.

Makes 4 meatless ball subs.
Note: I use Veggie Patch Meatless Meatballs, though really, you can use any brand you like. I had used another brand for a number of years, but unfortunately, I can no longer find that particular brand anywhere now. Whatever brand you buy is fine, as well as the jarred spaghetti sauce.
SUGAR SNAP PEAS AND CARROTS
Recipe Yield: Makes 4 servings.
Source: AICR
Recipe and image appear courtesy of American Institute for Cancer Research.
View this online at https://diabeticgourmet.com/diabetic-recipes/sugar-snap-peas-and-carrots.
Ingredients
1 tsp. canola oil
1 small garlic clove, minced
1 tsp. grated or minced ginger
8 oz. sugar snap peas
3 baby carrots, cut lengthwise in 8 strips
3 Tbsp. vegetable broth, or water
Salt and freshly ground black pepper, to taste
2 large basil leaves, cut crosswise in thin strips
Directions
Heat oil in a medium non-stick skillet over medium-high heat. Saute garlic and ginger until fragrant, about 30 seconds. Add peas and carrots to the pan, stirring to coat them with oil. Add broth or water. Cook, stirring occasionally, until peas are tender-crisp, about 4 minutes. Season to taste with salt and pepper. Mix in basil and serve.
Notes:
Additional Info: 2 g. dietary fiber
Nutritional Information Per Serving: Calories: 47; Fat: 1 g; Sodium: 109 mg; Protein: 2 g; Carbohydrates: 7 g
Diabetic Exchanges: 1-1/2 Vegetable
EASY BREADED TOFU NUGGETS
This is from Jolinda Hackett, who wrote for The Spruce Eats. For this recipe, Jolinda wrote, “Fool your kids with a meat-free tofu chicken nugget dinner, reminiscent of the favorite finger food they love to dip in ketchup, barbecue sauce, or ranch dressing.
“In this recipe, extra-firm tofu is coated with a seasoned panko breadcrumb mixture. Then, just like chicken, it's baked or fried to a crispy, addicting perfection.
“If you're squeamish about cooking with tofu, try this nugget recipe before you shun it, as the flavors mimic the taste of real chicken. Just make sure to follow the directions carefully, taking care to press the tofu before cooking for better consistency and taste. Then, decide on a cooking medium—for all-out flavor, go fried or for a low-fat preparation, go baked. Whatever way you choose, tofu (not) chicken nuggets make a perfect snack or dinner for picky kids and vegan eaters alike.
“Like most tofu recipes, this one will taste best if you press the tofu first. This allows the tofu to expel additional moisture so that it can absorb the seasonings for better flavor. It also helps the tofu retain its shape during the cooking process.”
Total: 70 mins; Prep: 45 mins; Cook: 25 mins; Yield: 4 servings
To view this online, click here.
Ingredients
1 block tofu (firm or extra-firm, well pressed)
1/3 cup soy milk (or another non-dairy milk substitute)
2 tablespoons mustard
1 tablespoon nutritional yeast
1 teaspoon onion powder
1 teaspoon garlic powder
1 teaspoon dried parsley (or Italian seasoning)
1/2 teaspoon sea salt
1/4 teaspoon black pepper
1/2 cup panko breadcrumbs
3 tablespoons high-heat vegetable oil (or coconut oil)
Directions
Note: while there are multiple steps to this recipe, these vegan nuggets are broken down into workable categories to help you better plan for preparation and baking.
Press the Tofu
Gather the ingredients.
Remove the tofu from its package.
Pat the block of tofu dry and place it in between two layers of paper towels.
Place a small cutting board (or flat-surfaced item) and a weight— like a pot or a brick—on top of the tofu.
Let the tofu sit for 30 minutes, replacing the paper towels when they become saturated.
Prep the Tofu
Once your tofu is pressed, slice it into 1-inch cubes or nuggets (about the size of a frozen chicken nugget).
In a wide, shallow bowl, whisk together the soy milk, mustard, nutritional yeast, and spices until smooth.
Place the panko breadcrumbs in a separate bowl.
Pan-Fry the Tofu
Heat the oil in a frying pan on medium-high heat.
Take one piece of tofu and dip it in the liquid mixture. Then carefully dip it in the breadcrumbs until well coated.
Add it to the pan and repeat the process.
Fry the pieces of tofu, turning them often, until golden brown on all sides.
Serve and enjoy!
Bake the Tofu
For a low-fat alternative cooking method, bake your tofu nuggets on a prepared baking sheet.
Preheat your oven to 350 F and then bake the tofu for 25 minutes, turning once, until golden brown.
Serve your vegetarian tofu nuggets with ketchup, barbecue sauce, or Sriracha hot sauce and enjoy.
BANANA SNACKING CAKE WITH SALTED CARAMEL GLAZE
This is from Melissa Clark in The New York Times cooking e-newsletter. Melissa wrote, “This buttery snacking cake is a bit like banana bread, but richer, and topped with a sticky caramel frosting that is dotted with crunchy flakes of sea salt. The frosting, made from brown sugar and heavy cream, is easier than a classic caramel, but just as compelling, with the sea salt contrasting perfectly with its sweetness. It’s important to use ripe bananas here. Soft, spotty ones with dark yellow skins will be the sweetest and most complex. Firm, pale yellow bananas just don’t have enough intensity to flavor the cake.”
For the Glaze:
Yield: 12 servings; Time: 1 hour, plus cooling
This was featured in “Three Snacking Cakes to Change Your Afternoons”, and can be viewed online here.
Ingredients
For the Cake:
1/2 cup unsalted butter (1 stick), melted, plus more for pan
1 1/2 cups all-purpose flour
1/4 cup granulated sugar
3/4 teaspoon baking soda
1/2 teaspoon fine salt
1 cup mashed banana (from 2 to 3 very ripe bananas)
1/4 cup sour cream
2 tablespoons dark brown sugar
2 large eggs
1 teaspoon vanilla extract
For the Glaze:
4 tablespoons unsalted butter (1/2 stick), cut into pieces
1/3 packed cup dark brown sugar
1/4 cup heavy cream
Large pinch of fine sea salt
1/4 cup confectioners’ sugar
Flaky sea salt, for serving
Preparation
Heat oven to 350 degrees. Grease a 9-by-9-inch pan, and then line with parchment paper, letting the two long ends hang over the edges by at least 2 inches.
In a large bowl, whisk together flour, granulated sugar, baking soda and salt. Whisk in bananas, melted butter, sour cream, brown sugar, eggs and vanilla.
Scrape into baking pan and smooth the top. Bake until the top springs back when lightly pressed in the center, and a toothpick inserted in the center comes out clean, about 25 minutes. Let cool completely.
When cake is cool, make the glaze: In a medium or large pot (not a small one because the mixture will bubble up), combine butter, brown sugar, heavy cream and salt. Bring to a full boil and continue to boil over medium heat for 1 minute. Remove from heat and let sit for 5 minutes.
Whisk in confectioners’ sugar until smooth, then immediately pour over cooled cake. Spread evenly across cake and let set for at least 30 minutes. Sprinkle with flaky sea salt before serving.
CAST-IRON APPLE AND BLACKBERRY CRUMBLE
This is from Matt Abdoo and was posted on the TODAY Show’s site. Matt wrote, “My dad used to make this for me growing up! Apples from upstate New York are some of the best in the country. They always added the perfect amount of tartness and sweetness to this crispy crumble.
“Technique tip: Use your favorite apples for a signature taste and to make it your own.
“Swap option: Pears work great and so do peaches! You can also use a 10- by 15-inch baking dish if not using the grill.”
Prep Time: 15 minutes; Cook Time: 40 minutes; Servings: 12
To view this online, go to https://www.today.com/recipes/cast-iron-apple-blackberry-crumble-recipe-t154818.
Ingredients
Crumble Topping
1 cup all-purpose flour
3 packs (1 cup) apple-cinnamon instant oatmeal
1 cup light brown sugar
3/4 cup chopped pecans
1 teaspoon baking powder
1/2 teaspoon kosher salt
8 ounces (2 sticks) cold unsalted butter, grated
Apple Filling
2 pounds honey crisp apples, peeled, cored, and sliced 1/4-inch thick
1 pound granny smith apples, peeled, cored, and sliced 1/4-inch thick
1 pint blackberries
6 tablespoons unsalted butter, melted
1/4 cup all-purpose flour
1 tablespoon cornstarch
2 tablespoon lemon juice
1 teaspoon cinnamon
1 teaspoon ginger
1/2 teaspoon allspice
1/2 cup light brown sugar
1/2 teaspoon kosher salt
Preparation
Pre-heat oven or grill to 350°F.
For the crumble topping:
In a medium sized mixing bowl combine flour, apple-cinnamon instant oatmeal, chopped pecans, light brown sugar, baking powder, salt and cold grated butter until it forms a coarse crumble.
For the apple filling:
In another large mixing bowl combine the apples with melted butter, flour, corn starch, lemon juice, light brown sugar, salt and spices and toss to fully coat the apples. Next fold in the blackberries and pour the apple mixture into a 12-inch cast iron pan.
To assemble:
Fully coat the top of the apple mixture with the crumble topping and bake for 30-40 minutes or until the crumble topping is golden brown and the apples are tender.
Allow the crumble to cool slightly, and then serve warm with vanilla ice cream or whipped cream. Or chill overnight and serve cold.
Subscribe to:
Posts (Atom)